Routine Creator Pro
A practical, procedural guide to building a routine from a blank file through to a finished show. Split into two halves on purpose: things you set up once and reuse forever, and things you do for every new routine you build after that.
Every screenshot in this guide is clickable — opens at full resolution in a new tab.
Everything in this first half you do a single time per show/hardware setup — not per song.
Before You Start
RCP reads and writes the same file format that VSA and Helmsman use, so if you're coming from VSA, your existing routines open directly — no conversion step. A routine is one .rcp file (or .vsa, treated identically), plus a set of small sidecar files RCP saves automatically for anything VSA Doesn't handle:
Moving a whole VSA library to RCP: Tools → Convert a Folder of VSA Routines to RCP… saves every .vsa routine in the folder you choose as an .rcp with the same name beside it, then moves the original .vsa files into an Original VSA files subfolder. Each new routine is checked to read back with every track and event before its original is moved. Audio and video files aren't moved, and a routine that already has an .rcp of the same name is skipped, so nothing is overwritten. A Helmsman playlist or VSA show that points to the old .vsa files needs to point to the new .rcp files.
| File | Holds | When it's created |
|---|---|---|
.scene | Stage layout, character names, Lead Vocal flag | When you save a Scene Map |
.modes | AGR Banter/Singing section boundaries | When you run Discover Modes |
.curves | Bezier easing control points, if you've used any | When you enable easing on an event |
.videoclips | One-shot video effect clips (Add Video Track) | When you add a video clip |
.audiosettings | Per-track volume/balance/mute/solo/lock/color | When you change a track's audio mix settings |
.syncedvideo | Manual overrides from Synced Video Settings — sync turned off for this routine, and/or a specific output screen | When you Save after changing something in Synced Video Settings |
[name].wav | The bounced, playback-ready mix | When you run Bounce Mix |
Everything above except [name].wav lives in one shared folder — Documents\Routine Creator Pro\Routine Sidecar Files\ — not literally next to the .rcp. This keeps a folder full of routines uncluttered, but it also means copying a .rcp file by itself to a USB drive or a different computer leaves its sidecars behind, and it opens there with defaults instead of your saved Scene Map/mix/etc. Use File → Package Routine for Sharing… instead of copying the .rcp by hand — it gathers the .rcp, its linked audio/video files, and every sidecar that actually exists for it into one folder, ready to copy or zip and send. On the receiving computer, just copy that folder's contents to wherever you keep routines and open the .rcpfile normally.
- Every servo's real min/max/default travel values for your hardware (or use the Halloween Skulls Defaults path in the Setup Wizard if that's what you're running)
- Your DMX interface connected, so Setup Wizard can auto-detect the port
Building a Character Template
The single most important one-time setup step — everything AGR does depends on this being right.
A Template is a routine file with every character named, every track you use named and addressed, and Scene Map filled in — but no events on it yet. Build it once, save it somewhere safe, and start every new routine from a copy of it instead of building tracks from scratch each time.
Help → Template & Naming Guide (a short standalone page, separate from this document) covers everything on this page plus the full device-name keyword table in one place — handy to keep open while you build, instead of scrolling this whole guide.
A character isn't a separate thing you set up first — it's just a name that becomes real the moment you use it as the first word of a track's name in step 3 below. Nothing in Setup Wizard or anywhere else in RCP asks you to create or register a character directly; naming tracks is how characters get created. If you're looking for a dedicated screen for this, there isn't one — that's expected, not a step you're missing.
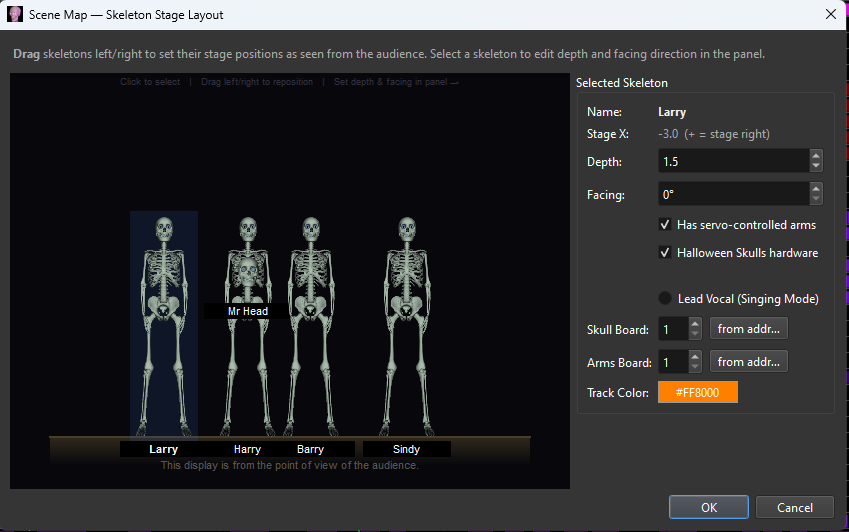
- Decide on each character's name (skip this step entirely if your whole cast is a single skull — see the callout above for the bare-naming convention that unlocks). Just pick the name you'll use for each skull or skeleton (Larry, Harry, Barry, Sindy — or your own cast of skeletons) — nothing to type or configure yet, you're only deciding what you'll call them once you get to step 3. You'll use these same names everywhere from then on: track names, Scene Map, Lead Vocal designation.
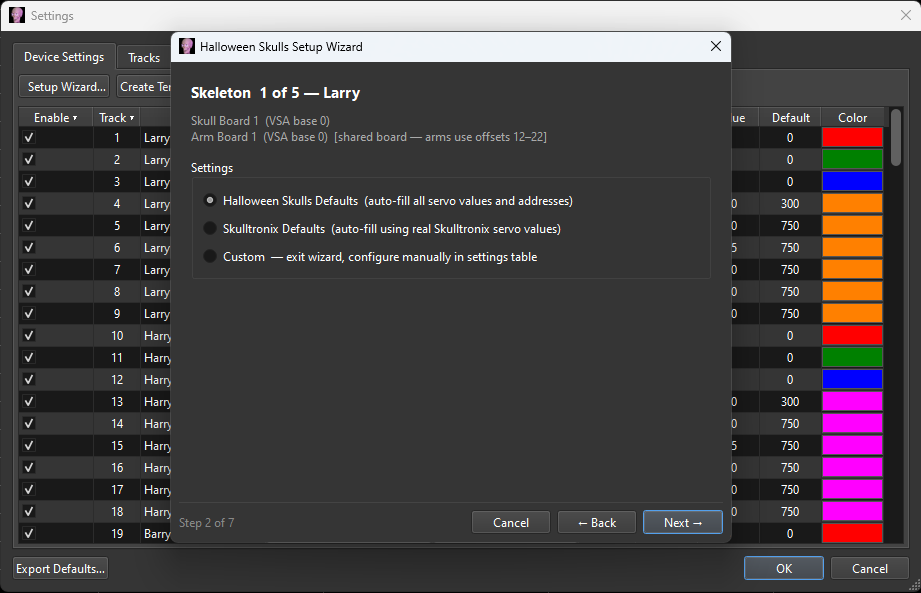
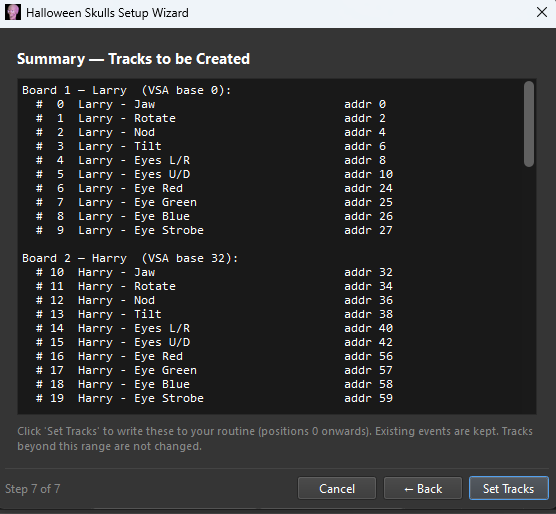
- Run the Setup Wizard and choose, per skeleton: Halloween Skulls Defaults, Skulltronix Defaults, or Custom. Either default option auto-fills every servo/fixture's address and travel range; Custom leaves you to configure the track list by hand. Skulltronix Defaults covers skull-head axes only (Jaw, Nod, Pan, Eyes, Tilt, Torso, Power) — no confirmed arm-servo layout exists for that hardware yet, so it never generates arm tracks even for a skeleton with arms.
- Arms mirrored on this board — a standard Halloween Skulls arm board carries the right arm on its first three channels (Twist, Lift, Elbow) and the left arm on the next three. If a skeleton is wired the other way round, tick this box on its page, or its arms will be set up on the wrong sides.
- The Halloween Skulls Defaults are standard values, not your skeletons' own calibration. Use the wizard to build a fresh layout in a new, empty routine. If you run it with a routine open whose tracks are already set up, it lists every track it would change — name and min / default / max, old and new — and how many programmed events those tracks hold, and Cancel is the default. The events themselves are never changed, so replacing calibrated settings makes the routine move differently on real hardware.
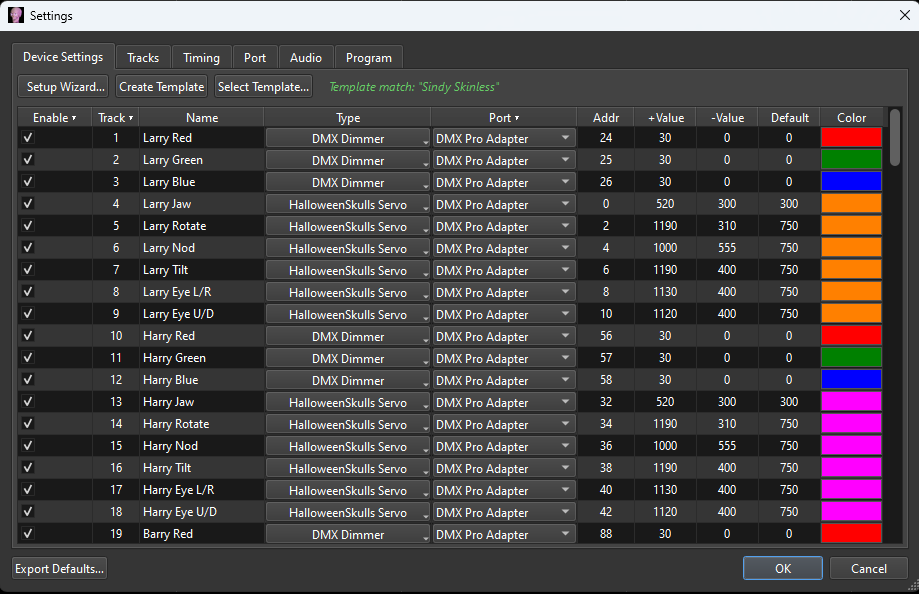
- Rename every track Setup Wizard just created, using the format:
[Character Name] [Function]. This is the actual naming step from step 1 above — RCP reads these names to know who owns a track and what it does, which is what makes automatic detection work everywhere else in the app.See Help → Track Naming Guide in the app for the exact keyword list it recognizes (jaw, rotate, nod, tilt, eyes L/R, eyes U/D, arm joints, LEDs, strobe) — names are case-insensitive and just need to contain the keyword, not match exactly.Track Example name Jaw Larry JawHead rotate / nod / tilt Larry Rotate,Larry Nod,Larry TiltEyes Larry Eye L/R,Larry Eye U/DArms Larry Arm R Twist,Larry Arm L Elbow, etc. - Set up Scene Map: place every character on the stage, set facing direction, flag Halloween Skulls hardware where it applies, and mark one character as Lead Vocal. The Lead Vocal flag is required before Singing Mode will generate anything at all in "Auto Generate Routine".
- Save this file as your template — name it something you'll recognize later, e.g.
My Skeleton Show Template.rcp, and keep it somewhere you won't accidentally overwrite with a finished show.



Setting Up CUSTOM Arms
Arms bought from Halloween Skulls already come with the right settings. If you built your own arms, or your skeleton uses different servos, three things in Settings decide whether Auto Generate, Copy to Character and the arm safety rules move them correctly. Your skeleton can have any name, and the numbers can be anything your servos need — RCP works every arm move out as a share of each servo's own travel from its Default.
- Name each arm track so RCP knows its side and job. Put the character's name and one of these in the track name:
For example
Servo Right arm Left arm Twist (turns the hand) Arm R TorR Arm TwistArm L TorL Arm TwistLift (raises the arm) Arm R SorR Arm LiftArm L SorL Arm LiftElbow (bends the arm) Arm R EorR Arm ElbowArm L EorL Arm ElbowArm R S BoborBob - L Arm Elbow. Right and left are the skeleton's own right and left, as if you were standing inside it — not as seen from the audience. Label them by what each servo is physically connected to: if your arm board is wired with the left arm on its first three channels, the labels must follow the wiring (the Setup Wizard has an "Arms are mirrored on this board" box for this). - Set each lift's and elbow's Default to its resting position — arm hanging down, elbow straight — and put that Default at one end of its range (equal to its +Value or its −Value). That is how RCP knows which way is "up" and which way "bends" on each servo, whichever direction it is mounted. A Default in the middle of the range tells RCP the servo can move both ways from rest, and it may raise the arm the wrong way.
- Set +Value and −Value to the real safe limits of each servo — where the arm actually stops, not the servo's full travel. RCP never sends anything outside them, and every move is scaled inside them. Twist servos rest in the middle (hand facing forward), so their Default sits between the two.
Twist direction. RCP assumes that on the right arm a higher twist value turns the hand toward the body, and on the left arm a lower value does. If one of your twist servos is mounted the other way round, mount it the standard way if you can, or contact us: otherwise the rule that stops both hands turning toward each other at once (they can lock together and break fingers) works backwards on that skeleton, and a Mirror image copy turns that hand the wrong way.
Quick check: open the 3D Preview and play a few seconds of an Auto Generated arm section. If an arm goes down when it should go up, check that servo's Default is at the correct end; if an arm moves on the wrong side, check the R / L labels.
Once a template exists with every track correctly named and Scene Map filled in, RCP already recognizes everything it needs from the track names alone. Starting your next routine from a copy of this file means Setup Wizard and Scene Map are already done — the only things left to add are that song's own audio and jaw programming, both covered in the next half of this guide.
Whatever order tracks are first created in is the order they stay in, forever — no wizard step, import, or export ever reorders them by address or any other key.
Building a Lighting Template
If your show includes any stage lighting RCP will control — wash lights, spotlights, strobes — give those fixtures the same one-time treatment as your characters.
- Add a track for each lighting channel your fixture uses (typically Red/Green/Blue for a color-mixing fixture, or a single channel for a dimmer/strobe).
- Name each one clearly and consistently — e.g.
Wash Light 1 - RED,Wash Light 1 - GREEN,Wash Light 1 - BLUE, orSpotlight - Sindy (as an example)if a fixture is dedicated to highlighting one character. - Set each channel's DMX address in Setup Wizard/Settings the same way a servo track is addressed.
- Save this alongside (or as part of) your Character Template, so every new routine already has your lighting rig ready to go.
By convention, a light track's default value already represents "off" — the same end-of-routine wind-down that returns servos to default also dims every light, so there's nothing extra to configure for a clean fade-out at the end of a show.
For a fixture that's purely on or off rather than dimmable, use the Relay device type instead of a dimmer — it auto-fills Min/Max/Default and every new event you draw on it just toggles on/off by itself, no value entry needed. See section 17 for the full explanation, including which controllers it can drive today.
Starting from here, this is what you repeat for each new song/performance once your template exists.
Starting From Your Template
- Make a copy of your template file and rename it for the new routine (e.g.
Zombie Attack.rcp). Working from a copy, never your master template, means a mistake in one show never costs you the reusable setup. - Open the copy — every track, address, and Scene Map setting from your template is already in place.
- Continue with audio import and jaw programming below.
Because your template's tracks already follow the naming convention and Scene Map is already filled in, RCP doesn't need any extra setup step to know who's who. Once this new routine has jaw tracks programmed and audio attached, it's ready for Discover Modes and AGR generation — nothing about the template step has to be repeated or re-confirmed.
The Timeline
The main working surface — tracks, events, the waveform, and the plot view, all locked to one shared zoom and playhead.
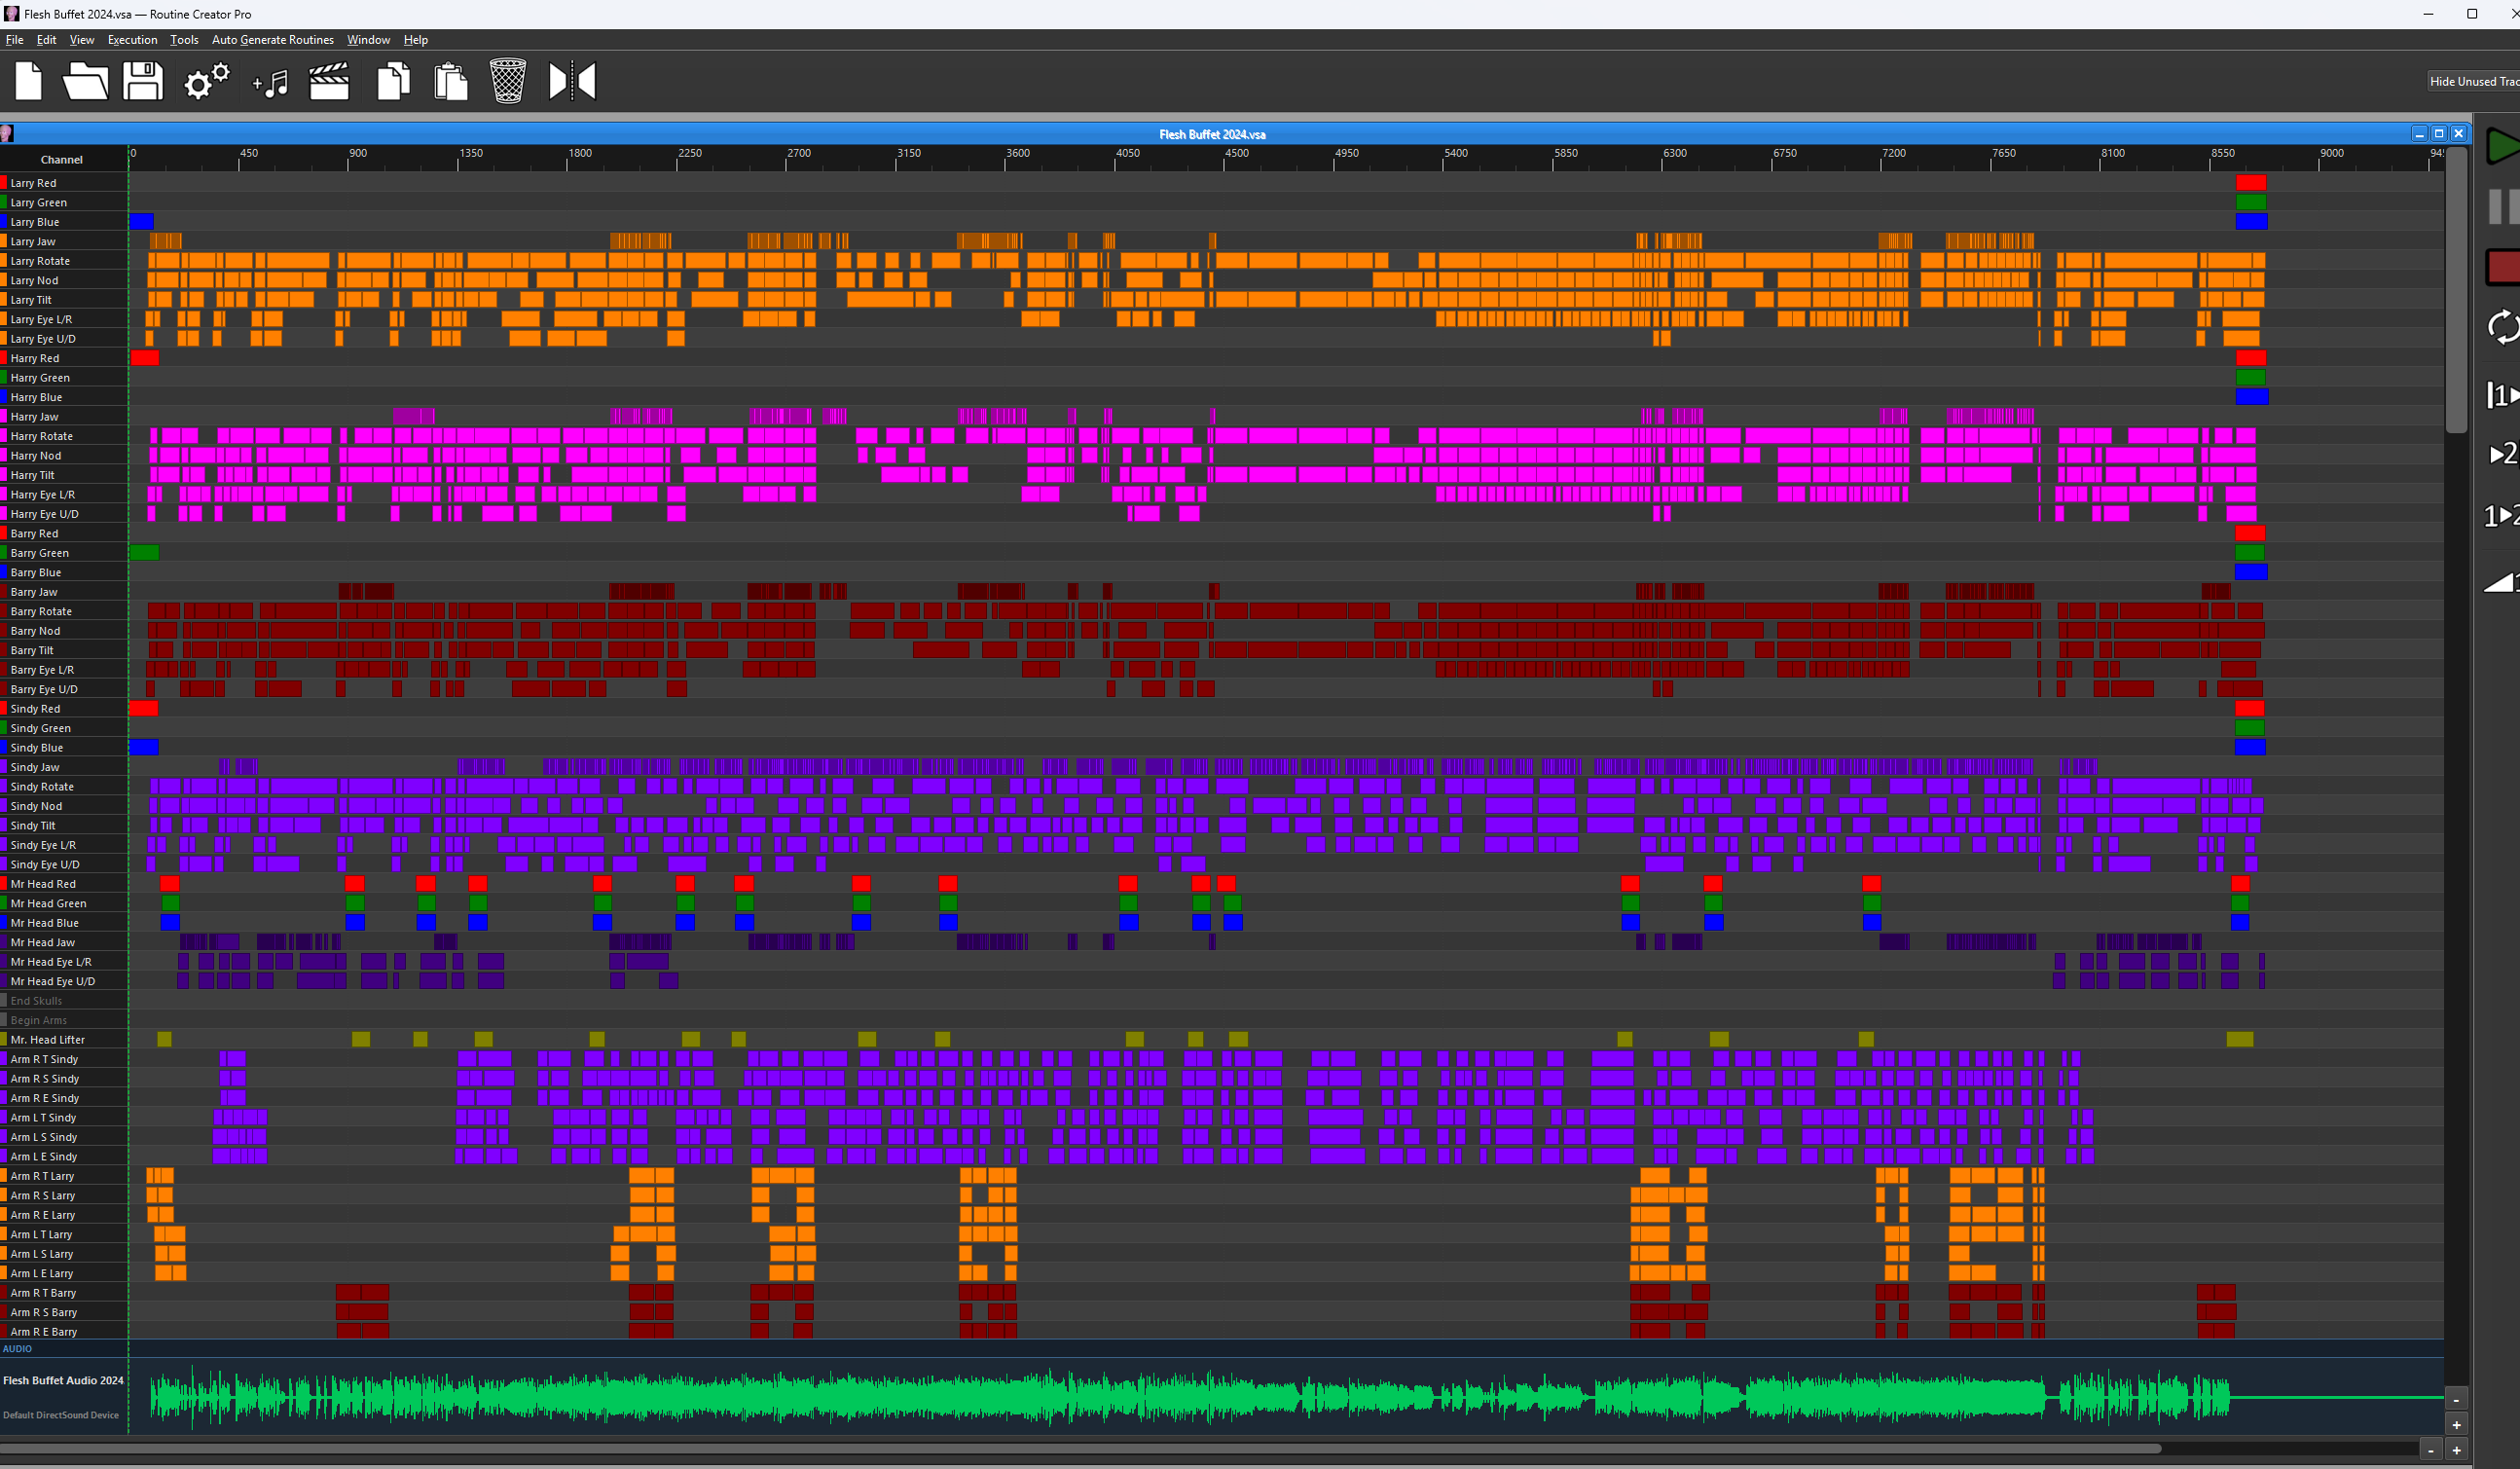
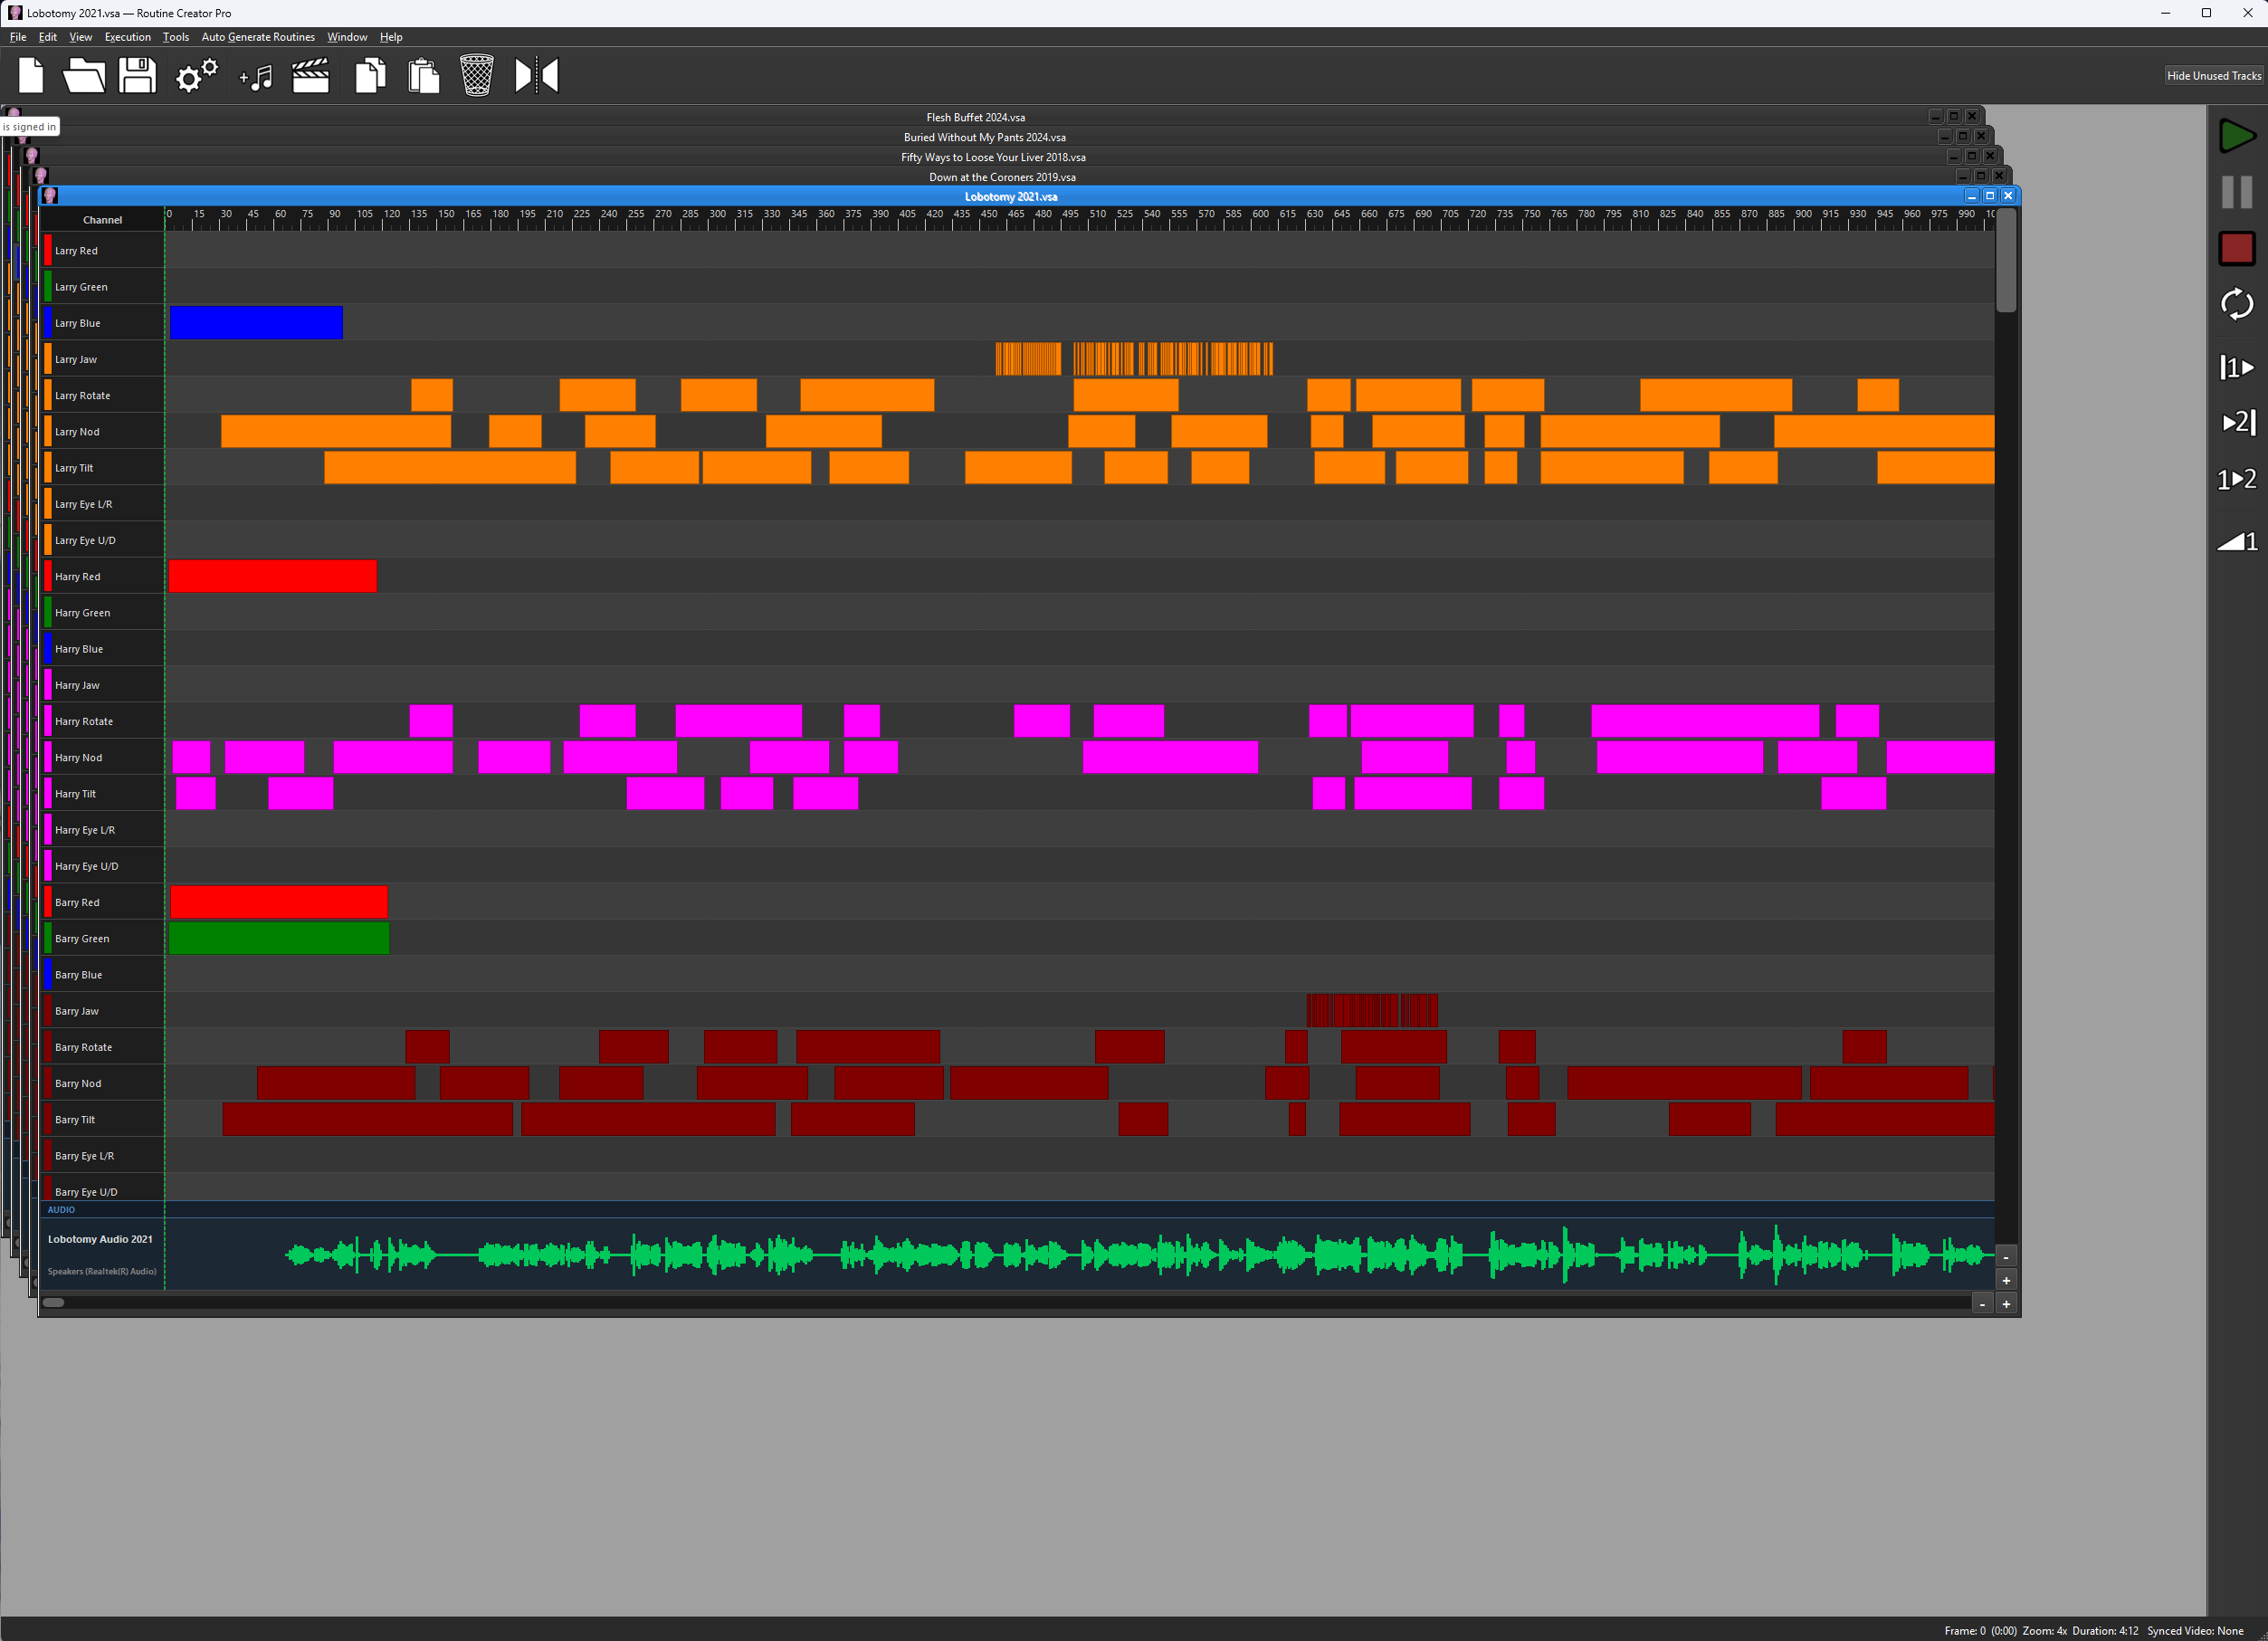
Every track is a horizontal row. An event is a bar on that row spanning the frames it's active. Drag to move, drag an edge to resize, double-click to open its properties. An event's starting position is never something you set directly — it's always wherever the previous event on that track left it.
A pinned Audio row (the combined waveform) sits below your tracks, and a Video Tracks panel appears below that once you've added at least one one-shot effect clip (lightning, jump scares) via Tools → Add Video Track… — see section 17 for the full details.
Hiding unused tracks
A template can have dozens of tracks a particular routine never touches. The Hide Unused Tracks button at the right end of the main toolbar hides every track that has no events on it at that moment, so you only see the ones you're working with. The button then reads Restore Hidden Tracks — click it to bring them all back. It's a one-time snapshot, not a live filter: a track you start using stays visible, and nothing is deleted or reordered.
Working with Events
Event Properties
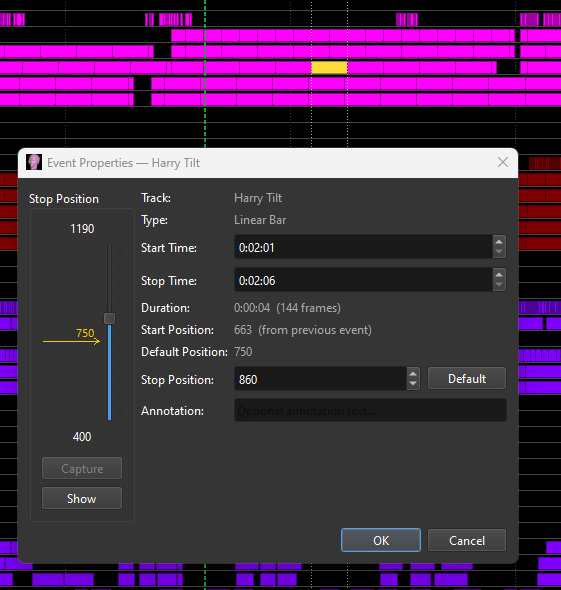
Double-click any event to open its properties: a vertical slider spanning that track's real min/max, a gold arrow marking the default position, live position preview sent to connected hardware as you drag, editable start/stop times, and a Default button that sets the stop value to the track's default in one click.
Lining events up
Click, drag, or resize any event and a dotted guide line appears through the full timeline height at its start and stop frame — the same visual language as the timeline markers — so you can line it up against events on other tracks at a glance. The guide disappears the moment nothing is selected.
Copy, paste, mirror & repeat
Select events, Ctrl+C, then right-click where you want them. The context menu offers four Paste Here modes, which differ only in whether the track and the time come from where you clicked or from where the events originally were:
| Mode | Where the events land |
|---|---|
| Preserve tracks, preserve time | Exactly where they came from — same tracks, same timecode. Use this when pasting into another routine that shares the same track layout. |
| Shift tracks, shift time | Fully relocated: the block's top-left corner moves to the track and time you clicked, everything else keeping its relative position. |
| Preserve tracks, shift time | Same tracks, moved along the timeline to where you clicked. For repeating a gesture later in the same song. |
| Shift tracks, preserve time | Same timecode, moved onto the track you clicked. For making another character do the same thing at the same moment. |
Ctrl+V is a shortcut for the third mode: same tracks, pasted at the First marker if one is placed, otherwise at the playhead.
The clipboard is shared across every open routine, so you can copy in one routine and paste into another — see Working with Multiple Routines.
To make a second skull repeat a long passage of head motion already built for the first: select the whole series on the original track, copy, then right-click the target track at the same point in the song and choose Shift tracks, preserve time. The motion lands on the new track at the identical timecode. If that stretch of the target track already has events, take Overwrite when asked (below) and RCP clears them for you in the same step — then it re-derives the start positions at both ends of what you pasted, so the transitions in and out stay smooth. No manual deleting first.
Paste copies the exact numbers. That is right between two characters with the same settings, but if their ranges differ — Sindy's arms and Larry's arms, say — use Copy these motions to another character (next) instead: it converts every move to the other character's own settings.
Copy these motions to another character
Select any of one character's moves — arms, head, jaw, eyes, eye lights, across as many tracks as you like — then right-click one of them and choose Copy these motions to another character…
- Copy to — any character in the routine, including the same one.
- Same sides — right arm to right arm, a head turn to the right stays to the right. Mirror image — what a mirror standing beside the first character would show: right-arm moves go to the left arm (and the other way round), and a head turn, tilt or eye glance to one side goes to the other side. Every movement keeps its meaning: a raise is still a raise, a bend still a bend, a twist toward the body still toward the body. Jaw, nod, eyes up/down and eye colours are unchanged.
- Preserve time — the copy lands at the same time as the original. Shift time — RCP waits for you to place a new marker (double-click the ruler, or drag a marker to a new spot) and the copy starts exactly there. Old markers are never used, so it can't land somewhere you've forgotten. Esc cancels.
Each move goes to the matching servo, by what the track does — jaw to jaw, right arm lift to right arm lift — not by track position, so the two characters can have different numbers of tracks. A track RCP can't identify is matched by name with the character's name swapped ("Larry Spotlight" → "Barry Spotlight").
Every value is converted to the target's own settings. A servo move becomes the same share of the target's travel from its Default — a 60% raise on Sindy is a 60% raise on Larry, even though their numbers and which end their arms rest at are different. Eye lights are scaled to the target's maximum brightness. Nothing can land outside the target's limits.
If the target has no matching servo for some of the moves (no elbows, say), RCP lists them and says they will be discarded before copying the rest. Existing moves in the way are handled exactly like a paste (below) — you're asked before anything is replaced — and the whole copy is one Undo step. Moves not on the character's own tracks (spotlights, wash lights) are left out.
This is not the same as Mirror & Repeat, which repeats moves earlier or later in time on the same tracks.
Copy To Character — between routines
Use this to bring one character's moves into a different routine — for example a single-skull routine into your show template, where that skull lives on other tracks and addresses. An ordinary paste goes by track position, so a single-skull routine's moves would land on whoever is in the first rows of the template, with that character's names and addresses. Copy To Character puts them on the right character instead. It works for arms, head, jaw, eyes and eye lights alike.
- In the routine you're copying from, choose Tools > Copy To Character…
- Copy from — the character whose moves you want.
- Copy to — the name of the character that should get them.
- An existing character in the routine you'll paste into, or a new character for that routine.
- Copy every event in the selected tracks — tick it to take whole tracks from start to end; then one selected move on each track is enough.
- Right-click and drag a box around the moves to copy. (If you had already selected them, that selection is used straight away.)
- Go to the routine that should get them — use the Numbered List, or have both open with Cascade or Tile.
- Right-click where the moves should start and choose Paste to Character Here. The first move lands where you clicked; the rest keep their spacing.
An existing character: each move goes to that character's matching servo, by what the track does (right arm twist to right arm twist), and is converted to that servo's own settings the same way as above — the same share of its travel, so the arms move the same way with different numbers. The servo settings and addresses in the receiving routine are not changed. If a track's name doesn't have the character's name yet, it is renamed — "Larry R Arm Twist" becomes "PaPa VooDoo R Arm Twist". If the character has no servo for some of the moves yet (a skull that never had arms, say), RCP asks whether to add them as new tracks, starting at the row you right-clicked.
A new character: right-click in an unused row — the new tracks go there and in the rows below it, so leave enough unused rows. Each new track gets the character's name and exactly the settings and addresses it had in the routine you copied from, because the hardware is already set up at those addresses. If another track in the receiving routine already uses one of those addresses, that track is added without an address and RCP lists it so you can set it in Settings — two tracks never drive the same servo.
Existing moves in the way are handled like any paste — you're asked before anything is replaced — and the whole paste is one Undo step. The copy stays ready, so you can paste it into more routines.
When a paste would overlap something
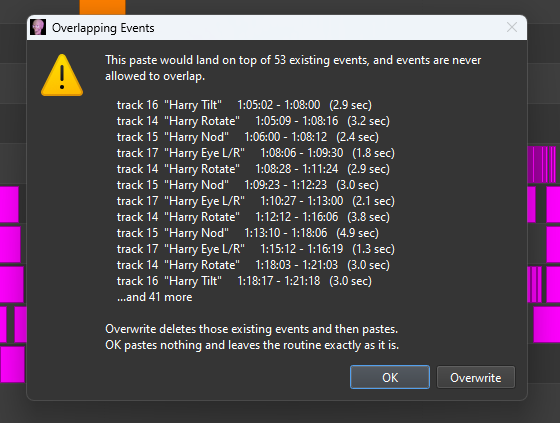
Two events can never overlap on the same track — that rule is absolute, because the hardware can only be told one position at a time. So if a paste would land on top of existing events, RCP stops and shows you exactly which ones are in the way, with their track, timecode and duration:
| Button | What happens |
|---|---|
| OK | Nothing is pasted and the routine is left exactly as it was. This is the default button, so pressing Enter is always the safe answer. |
| Overwrite | The listed events are deleted, then the full paste goes in. |
A paste is all-or-nothing — it never puts in some events and quietly drops the rest. Long lists are trimmed to the first twelve with a count of the remainder, so the dialog can't grow past the bottom of your screen.
If a pasted event clips the end of a long existing one, Overwrite removes that existing event entirely — it does not shorten it. That is deliberate: trimming an event would silently change the motion it produces. A five-second ramp from 300 to 420 cut down to two seconds either never reaches 420 or gets twice as steep, and neither is visible on the timeline. Deleting is blunt, but the dialog names every event with its duration first, so a one-second paste about to remove a thirty-second move is something you see before you commit to it. Ctrl+Z puts it all back.
Pasting onto the wrong kind of device
Track numbers are easy to misjudge, and a position value means something completely different depending on what the track drives — a relay is simply 0 or 1, a Halloween Skulls servo runs 250–1250, a Pololu servo 2000–10000. So if events would land on a track driving a different kind of device, RCP names each one and asks whether that was really the track you meant. It happens when you paste onto other tracks. (Dragging events never changes their track — see below.)
This only triggers on a genuine change of device kind: servo onto relay, servo onto an LED dimmer, and so on. Moving motion between two tracks that drive the same kind of thing stays silent, even if their Min/Max/Default differ, because that is usually deliberate and it doesn't change the destination track's own settings.
Spacer tracks are the one case with no "do it anyway" option. They are labels, with no address and nothing attached, so an event on one could never do anything.
Adjusting a whole track's amplitude
To make a whole track move more or less — a jaw that should open wider, a head turn that's too big — right-click the track's name in the Channel column and choose Adjust Track Amplitude…. It works on any servo or dimmer track, and on every event on that track at once.
The slider runs from −80% to +80%, with 0% in the centre meaning no change. The timeline updates as you drag, and Cancel puts everything back.
Watch the real skull while you drag. Park the playhead on a move you want to judge (one of the biggest jaw moves in the show works well), then open the dialog: as you drag, the servo goes to that move's new end position. If the playhead isn't on a move, the track's biggest move is used. When you click OK the servo stays on the result; Cancel puts it back.
The amount shows on the track. After OK, the track name shows the amount in blue on the right — for example +40% — next to any amber Servo Offset number, so a scaled track is never invisible. Reset to 0% (or Undo) removes it.
- + (More) moves each event's end position further from the track's Default, toward Max or Min on whichever side it already sits. A jaw opens wider; a two-sided servo like Rotate swings further both ways.
- − (Less) pulls each event's end position back toward Default, so the motion gets smaller.
- The track's Default position never changes, and start positions follow on automatically, as they always do.
- It stops at 80% each way: at a full 100% every event would sit at its limit (+) or the servo would never move at all (−).
- Relay (on/off) and spacer tracks don't offer it — there's no amplitude to scale.
You can come back and change it. The routine remembers each track's amplitude change and the events' original values. Open Adjust Track Amplitude… on that track again and the slider starts at the current amount (for example +30%); any new setting is worked out from the originals, so you can turn it up or down freely, and Reset to 0% puts the original values back exactly. If you edit that track's events by hand afterwards, the dialog says so and takes the events as they are now as its new starting point.
The change is part of this routine only — it rescales this routine's own events (so Helmsman plays it too), it is saved when you save the routine, and it is never carried into your templates, your saved default layout or other routines.
It's a single step in Undo, so Ctrl+Z reverses the whole track in one go. It replaces the old Boost Jaw Peaks item from the event menu, which only ever changed the events you had selected and could only go up.
Shifting a track's range in one routine (Servo Offset)
If a track's motion sits in the wrong place in one routine — a jaw or head move that doesn't reach far enough in an auto-generated part, or some other mistake in that routine — right-click the track's name and choose Adjust Servo Offset…. The slider shifts the track's whole range — Min, Default and Max — by the same amount, and the readout shows exactly what each becomes (for example Default 750 = 825). While you drag, the real servo moves to its corrected Default so you can watch it. You can also type an exact number.
To make a motion itself bigger or smaller, use Adjust Track Amplitude instead. It also works as a quick, temporary fix after a servo replacement done in a rush — a skull that now sits crooked — so the show can go on. Because the offset is saved with this routine only, it corrects just this routine; when you have time, straighten the servo properly in the board's own programming (offsets set with the Halloween Skulls configuration program) and then remove the offset here with Reset to 0.
- The events are never changed. Tracks and events keep their values; RCP converts positions on their way out to the servo.
- The offset is saved with this routine only. It is not added to your templates or your saved default layout, and it doesn't change any other routine — set it in each routine that needs it, and save the routine. Live Action uses the offsets of the routine that's open. Once a servo has an offset, its track name shows the amount in amber, for example +75. (Before version 1.0.0.33, offsets were saved on the computer and applied to every routine; the first time a newer version starts, it lists any of those old offsets once so you can re-enter them where needed.)
- Near a hard limit (250 at the bottom, 1250 at the top for a Halloween Skulls servo), the end that would pass the limit stops there, while Default and the other end still move the full amount. Only the side that hit the limit is gently squeezed, so motion stays smooth.
- Jaw and arm tracks whose Default equals Min work the same way.
- To remove an offset, open it again and click Reset to 0.
Helmsman does not read Servo Offsets, so a routine played in Helmsman plays without them. If the routine will be played in Helmsman, correct the motion in the routine's own events instead — for example with Adjust Track Amplitude, which changes the events themselves.
Servo Reverse — and Match My Servo
Sometimes a servo runs the opposite way from the one a routine was written for. Two common cases:
- A servo was replaced with one that turns the other way — for example a Hitec swapped for a Futaba of the same size, maybe as a quick spare during a show.
- The routine was written for a servo that turns one way, but your skull or arms have one that turns the other way — for example arm scapulas mounted on the opposite sides of a different skeleton, so the twist that should swing out now swings in toward the body.
Why not just a "reverse" switch? A plain reverse mirrors every number around the middle of the range. That's only right when the track's Default sits exactly in the middle. If it doesn't, two things go wrong: the servo's rest position moves (so you'd have to take the skull apart and re-align it), and a lopsided range swaps sides — the side that should have plenty of room gets the short side's room instead, and a servo could be driven into something solid.
So RCP translates instead. You show it three positions on your real servo, and every move on the track is converted so the servo does what the routine meant:
- The routine's Default becomes your servo's own rest position — it stays exactly where it's aligned now.
- A move that goes, say, halfway from Default toward the routine's Max goes halfway from rest toward your servo's limit in that same physical direction — even if, on your servo, that's the lower number.
- The same for the Min side, using that side's own room. Each side scales on its own, so a long side keeps its range.
Match My Servo — one routine
Right-click the track's name and choose Match My Servo…. There are three sliders, and the real servo moves to each position while you drag:
- Rest (Default) — where the servo sits at rest.
- Toward the routine's Max — how far it can go in the direction the routine calls "toward Max".
- Toward the routine's Min — the same for the other direction.
Reversed servo fills in a straight reverse to start from — every position mirrored around the servo's centre (750 for a Halloween Skulls servo), so it rests at the same physical spot and simply moves the other way. For a servo whose Default is already 750, like the Halloween Skulls arm twists, that's usually all you need. Drag any slider to fine-tune. For a one-sided track such as a jaw or an arm lift, only the side it actually moves to is offered. The readout shows the track's new Min / Default / Max and "(runs the other way)" when it's reversed.
Click Convert… and RCP warns you that it is about to rewrite that track in this routine — its Min / Default / Max and every move on it. Choose:
- Save a Copy First, Then Convert (recommended) — saves the routine as it is now beside it, as "name (before servo change).rcp", then converts. Use this when the servo is a temporary spare and the proper one is going back in later.
- Convert Without a Copy — converts straight away.
- Cancel — nothing changes and the servo goes back where it was.
What changes: the track's own Min / Default / Max in this routine's settings (Tools → Settings), and every move on that track. Your saved default layout is not changed, and RCP won't flag a converted track as "different from your layout" when the routine opens — it's different on purpose. Nothing in the board's own programming changes either.
The conversion is one Undo step. Because the routine itself is converted, it plays the same in RCP, Helmsman and VSA — nothing extra to remember at show time. Save the routine to keep it.
Match My Servo — your other routines
With Remember this change on this PC ticked (it is, by default), RCP remembers the change for that output address. Whenever you open another routine whose track at that address still has the old servo's settings, RCP lists it and offers to convert it too. Tick Do this automatically from now on and it's converted as soon as it opens. Either way, nothing changes on disk until you save — use Save As to keep the original. RCP keeps track of which routines it has already converted, so it never converts the same one twice.
To convert a whole library at once, choose Tools → Match My Servo: Remembered Changes…, tick the change(s) to apply and click Convert Routines in a Folder…. Every routine in that folder that was written for the old servo is first copied, exactly as it was, into a Before servo change subfolder, and then converted in place. Routines that don't need it are left alone, and a report shows what happened. Routines open in RCP are skipped — close them and run it again.
The same window lets you switch a change between Automatic and Ask first, or Forget it — for example once the proper servo is back in.
Match My Servo — the servo runs the other way, or its rest and limits sit at different numbers. Converts the routine. Adjust Servo Offset — the whole range just needs nudging in one routine, without changing the events. Adjust Track Amplitude — the motion should be bigger or smaller. A Halloween Skulls board can also reverse a servo in its own programming (the Halloween Skulls configuration program); Match My Servo works with any board. Live Action on a serial board has its own Reverse box for each feature on the Feature Selection rows (the jaw doesn't need one — its Default is always closed and it opens toward the other end).
Undo and Redo
Ctrl+Z and Ctrl+Y cover every timeline edit — creating, deleting, moving, resizing, pasting, Mirror & Repeat, Overwrite and Adjust Track Amplitude. The Edit menu names what it is about to undo ("Undo Paste", "Undo Move Event(s)") so you can check before committing.
Each open routine keeps its own separate history, so Undo always applies to the routine you are looking at and can never reach into another window. The last 25 edits per routine are kept.
Bezier easing
Right-click an event → Enable Bezier Easing to trade its straight linear ramp for a two-handle curve, shaped directly in the Plot view. Drag the near-start handle to shape how the servo leaves its start position; drag the near-end handle to shape its approach. Saved in a .curves sidecar and auto-flattened to 16 linear steps on VSA export, so it still plays correctly in Helmsman/VirtualHaunt.

Audio: Mixer, Vocal Isolation & Bounce
Full walkthrough for every new song — from raw audio files to the one mixed-down WAV that actually gets played back on the hardware.
The Audio Track Mixer
- Open the Audio panel and import your file(s) for this routine. There's no fixed limit on how many tracks a routine carries — a full song might have separate lead vocal, backup vocal, and instrumental files, or just one fully-mixed file.
- Each imported file gets its own mixer strip: volume, left/right balance, a start offset (to nudge one file's timing relative to the others), and mute / solo / lock. For an exact level, double-click the Volume or Balance slider and type the value: volume 0–200 %, balance −100 (full left) to 100 (full right), 0 = centre. The master volume in the header bar works the same way.
- Assign each track's output device if you're using multiple sound cards for different sounds in different rooms; otherwise leave it on the default.
- Use mute/solo while you work to hear one track in isolation without changing anyone else's levels.

Extracting lead and backup vocals from one mixed file — Jaw Stems
If you only have a single, fully-mixed song file (lead and backup vocals already combined), Tools → Jaw Stems… uses AI vocal separation to split it into a Lead Vocal, Backup Vocals, and Instrumental file before you run the Jaw Programmer on each — so your lead singer and backup singer's jaw tracks can be generated independently, without you cutting stems by hand first.
- Import the fully-mixed song file as you normally would, then open Tools → Jaw Stems… and browse to it (or run it directly against an already-imported track).
- Three processing parameters, adjustable before running: Noise gate (in dB — how quiet a moment has to be before it's treated as silence), Jaw smoothing (in ms), and Phrase gap (in ms — how much silence separates one phrase from the next). The dialog shows live progress and the underlying separation engine's own log output while it runs — expect this step to take a few minutes (longer on a machine with no GPU), with real percentage updates that can go quiet for a stretch at a time. A second, continuously-animated bar and an on-screen reminder stay up the whole time specifically so a slow stretch never looks like a freeze.
- When it finishes, click Save Stems… — the Lead Vocal, Backup Vocals, and Instrumental files land in the Audio Track Mixer as three new tracks, each with its own strip, ready to balance like any other imported audio.
- Run the Jaw Programmer once on the Lead Vocal track (for your Lead Vocal character) and once on the Backup Vocals track (for the backup voices) — each gets its own accurate jaw track instead of one track trying to represent everyone at once. Highligh the track you want to program to select it before running Jaw programming on it. The backup singers share the one backup track as they usually sing in unison.


This is a quick, automated shortcut — not a replacement for professionally mixed stems. Results vary by song: lead vocal and instrumental separation are usually solid, but backup vocal isolation can be inconsistent, and on some songs it may be unusable. Treat the output as a starting point that may need manual editing before it goes into your final routine.
For songs where the automatic separation isn't good enough, Halloween Skulls recommends karaoke-version.com — thousands of songs available with studio-quality stems, including separate Lead Vocal, Backup Vocals, and Instrumental tracks (plus individual instrument stems). This is where we source many of our own tracks.
This same text appears in-app the first time you open Jaw Stems, and anytime after via the dialog's own Disclaimer link (top-right) — check "Don't show this again" to stop it popping up automatically.
There's no GPU acceleration path yet, which is the main reason a single song can take several minutes. AI audio separation is a genuinely fast-moving field — as faster and better-quality models (and real GPU acceleration) become practical to bundle, we intend to update this feature to use them. The separation engine itself now ships fully self-contained (compiled, models bundled in) — no Python install or internet connection needed on your machine to use it.
Jaw Programmer
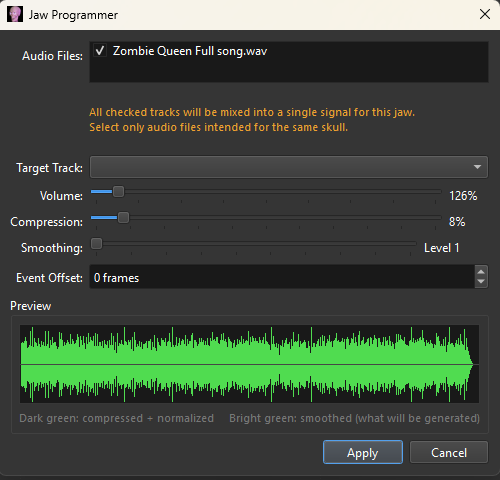
Run this once per character, on that character's own isolated vocal file (or the single mixed file, if you're not separating vocals). It reads amplitude directly from the audio and writes jaw-servo events automatically, with a built-in 164ms offset correction the same way every VSA routine has quietly relied on. This is the one manual step AGR depends on — AGR reads jaw tracks, it never writes them.
Volume (100–500%) is a plain gain boost applied to the audio before anything else — raise this if your source file just isn't loud enough overall, without touching how the loud and soft moments relate to each other. This is deliberately separate from Compression, which reshapes that relationship (brings quiet moments up relative to loud ones) — cranking Compression to fix a too-quiet source also flattens out the real range of motion, since it narrows the gap between the loudest and softest points instead of just making everything louder. Use Volume first for a quiet source, then Compression only if you also want quiet passages to move the jaw more than they naturally would.
Which way the jaw opens. The track's Default is always the closed position, and generated jaw moves open toward whichever limit is farther from Default. Halloween Skulls jaws rest at Min and open toward Max; a home-built jaw whose servo opens toward the lower number just needs Default (and Max) set to closed and Min to open.
Adding jaw for a small piece of audio later. Jaw moves are only created where the ticked audio files have sound — mute and solo in the mixer don't matter here, only the ticks in the Jaw Programmer's own list. So to add jaw for a short clip you added afterwards, tick just that clip. If the jaw track already has moves, RCP asks: Replace all of them, or Add into the empty parts only. "Add into the empty parts only" keeps every existing jaw move and adds the new ones only where the track is empty — like pasting into a gap; any new move that would overlap an existing one is left out, and RCP tells you how many. Change Jaw Settings on the result window puts the track back exactly as it was before you started, so you can try again without losing anything, and the whole visit is one Undo step.
Bounce Mix
Once every audio track's volume and balance is set the way you want it, choose Tools → Bounce Mix (save the routine first). You don't need to select anything: it mixes the whole routine down to one file exactly as the mixer is set right now — muted tracks left out (and only the soloed ones if any track is on Solo), every track's volume, balance and position on the timeline, and the master volume — and saves it next to the routine as [RoutineName].wav, replacing any earlier bounce of that name. This bounced file is what actually gets played back by Helmsman/VirtualHaunt and the real hardware, and what AGR's beat/lyric analysis uses.
The bounce replaces the audio tracks straight away. As soon as it finishes, the bounced file takes the place of all the tracks that went into it, so what you hear in RCP is exactly what was bounced. A message confirms it — to reverse the bounce and get the original tracks back, use Edit → Undo (Ctrl+Z); its only button is Close Message. Your original audio files are never changed, and nothing is saved until you save the routine. If the routine already uses an earlier [RoutineName].wav as one of its tracks, RCP asks first, because the new bounce overwrites that file and Undo could bring the track back but not its old sound.
Finish balancing your tracks and running the Jaw Programmer on each character before you bounce — if you change a volume or re-run jaw programming afterward, bounce again so the played-back file matches what AGR analyzed.
What AGR Needs From You
Auto Generate Routines reads what you've already built and writes everything else — it never invents the parts that define your show.
- A template-based routine (see sections 2–4) with every track named following the
[Character] [Function]convention. - Jaw servo tracks already programmed for every speaking/singing character — see the Audio section above.
- A bounced audio file. Run Bounce Mix first, or supply a WAV exported from your own DAW — same result either way.
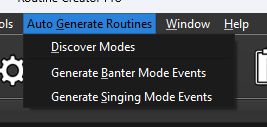
- With jaw tracks done and audio bounced, go to Auto Generate Routines → Discover Modes. It analyzes the audio in the background and shows its best guess for Banter vs. Singing sections as draggable, editable markers above the waveform. Drag a boundary to correct it, or right-click to add one by hand.
- Go to Auto Generate Routines → Generate Banter Mode Events or Generate Singing Mode Events depending on the section. Both run a quick pre-flight check and require Discover Modes to have run, (or manual markers placed) first.

Banter Mode
Conversational dialogue — one pass writes head, eye, and arm motion for every speaking character.
Every rule in AGR answers to one governing idea: never give the audience a reason to stop believing they're watching characters, not machines. In Banter Mode that means:
- Attention — whoever isn't speaking looks at whoever is, eyes leading the head, with independent 3-6 second timers driving natural wandering when no one's forcing their attention. About 1 in 11 looks uses an unsettling "side-eye" (head turns one way, eyes stay on the speaker) for texture.
- Constant idle motion — every character has continuous, independent movement on tilt (a mix of subtle and bigger leans), so nothing ever sits frozen. Nod is used only now and then, as punctuation.
- Group reactions — everyone looks at whoever is talking every time, even if they have spoken before.
- Arm gestures — pulled and remixed from a library of real recorded reference moves, never repeating any gesture twice on the same character within a routine. Arms that only move one way from their rest position (the Setup Wizard rests a right arm at its Max, and a left arm's Lift and Elbow at Min) always get real motion, never an event that just sits at Default.
- Mr. Head — rises with his own Up routine from the Motion Library before his first line, and stays up through the Banter section. At the end of it he goes down (spotlight off, lift down, eyes back to centre, eye LEDs fading out) unless his next line comes within 10 seconds, in Banter or Singing. As he rises, everyone else looks at him: eyes first, then the head turns toward him and nods down for about a second, comes back up while still facing him, and after about 4 seconds they go back to looking around — each a few frames apart, never in lockstep.
Auto Generate never takes a Nod servo below 600 on a Halloween Skulls servo (the same point on any other controller's range) — lower risks the jaw hitting the neck and burning out the jaw servo. Apart from looking down at Mr. Head, nearly all nod motion is between Default and the upper limit. Your own +Value/-Value limits in Settings are always obeyed on top of this.

Singing Mode
Music and vocals — a lead performer plus a backup group, all locked to the song's real beat and phrasing.
- Everything Banter Mode needs (jaw tracks, bounced audio), plus:
- A Lead Vocal designated in Scene Map. Without one set, Singing Mode generates nothing at all — it has no way to know who's the featured singer versus backup. (This is normally already done in your template — see section 2.)
- A song with a detectable beat. Rhythm analysis handles the vast majority of real recordings; a cappella and unusually loose-tempo tracks are the edge cases worth a second look after generating to make sure they are following the song the way you would like.
What it generates
- The lead performs independently — real recorded arm gestures, stretched to read as slow and deliberate, with the head loosely following whichever arm joint moves the most in each gesture.
- The backup group is generated once on a reference performer whenever two or more of them are singing together, then copied or mirrored to the rest — so they're never independently improvising out of sync with each other. Arm choreography draws from both a fully procedural pattern library and a set of real hand-choreographed clips pulled from a premade show archive Made for this program, mixed automatically for variety. A repeated chorus always reuses the same choreography it used the first time, so the audience can actually recognize the repeat. Beyond the classic 3-performer trio, groups of From 2-5 automatically get one of three additional formations instead of everyone doing the exact same thing at once — Half/Half (the group splits into two smaller sub-groups), Alternating, and Chase (a build-hold-release wave that can roll across the group or reverse direction) — chosen and varied automatically, nothing to configure by hand.
- Whoever has no arm hardware gets the reference performer's head motion instead, so no one's left doing nothing during a big ensemble moment.
- Everyone's eyes lead their own head motion, beat-driven, the same way Banter Mode's eyes lead a look.
- The audience stare — in the freestyle (not unison) parts, each skull now and then picks a random spot in the audience and looks right at it: eyes first, the head follows, the eyes stay locked on that spot while the head drifts a little, and after about 3 seconds it goes back to normal. Sometimes the same skull comes back to the same spot later. Every skull at its own times, with its own targets.
- Nod as punctuation — the beat-locked head bob runs as a four-bar phrase only two or three times per song, plus the occasional short lift on a beat, so it stands out when it happens. A sudden loud blast or scream gets a quick startled head turn — rarely, so it stays a moment.
- Mr. Head follows the same up/down rule as in Banter Mode: down after his part unless his next line comes within 10 seconds.
- Motion stops when the music stopsThe party continues until the music stops.
- High Swing Mode — automatic head bob for up-tempo songs. No toggle to flip: a song's own detected tempo decides it. At or above 120 BPM, the backup group gets a beat-locked head bob in its four-bar phrases (the bottom of the bob always lands right on a beat); at or above 130 BPM the lead singer gets one too. Each qualifying song gets a single bob per bar (on the downbeat) versus a double bob (downbeat plus beat 3) — slower qualifying tempos lean toward double, faster head bobs toward single, so it never looks rushed. All five numbers (both BPM thresholds, both double-bob percentages, and the tempo the percentages slide between) are editable in Tools → Settings → Program if the defaults don't feel right for your material. This is not through the whole song non-stop, it is used sparingly to highlight exciting musical segments in an up-tempo song with a great beat.
(See the generated-events screenshot in the Banter Mode section above — the same routine's Singing section, on the right, is the lead singer plus the backup group (in this case).

Regenerating Part of a Routine
Select a range of events (or just the arm tracks within one) and use Regenerate Selection to redo just that piece rather than the whole routine. It automatically uses whichever mode — Banter or Singing — the selection actually falls in, the same as a full Generate pass would for that stretch of the song. A dedicated dialog for arm-only selections lets you force single-arm, double-arm, or "whatever fits naturally" instead of leaving it to chance. Every Regenerate gives you something different from what was there — it never hands back the same result twice in a row.

Playback & Safety Ramps
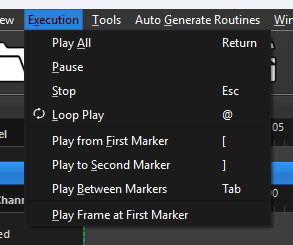
Play starts from the current playhead position; Stop returns to the start frame (double-click Stop to jump straight to frame 0); Pause/resume and Loop work as you'd expect. Play Frame at First Marker ramps every servo to its position at the first marker over a deliberate 3 seconds — useful for pre-positioning before a live run.
When a routine plays through to the end, the playhead returns to the start and waits there, so pressing Play again replays the routine rather than doing nothing.
Any time a servo's commanded position changes outside of normal playback — scrubbing, moving the playhead, dragging in Event Properties — it eases there over 400ms rather than snapping, to protect the mechanism.
Larger changes ease more slowly: after you edit an event and then move the playhead, and for Play Frame at First Marker, the servos take a full 3 seconds to reach their new positions. While a 3-second ease is running, RCP greys out all of its controls — menus, toolbar buttons, the timeline and keyboard shortcuts — and the status bar tells you why. This is intentional, not a fault: everything comes back by itself the moment the servos arrive. If you are in the middle of dragging something when an ease starts, the controls grey out as soon as you let go of the mouse button.
Playback never starts while any ease is still moving the servos. If you press Play during one (including the short 400ms ease), playback waits and begins as soon as the servos are in position; pressing Stop in the meantime cancels it. Why this matters: in versions before 1.0.0.28, pressing Play during a 3-second ease let the ease and playback both drive the servos at once. They fought each other, causing harsh jittering and a burst of very fast motion that can strip servo gears and damage 3D-printed parts. If you are running an older version, please upgrade to 1.0.0.28 or later.
Working with Multiple Routines
Open several routines at once, copy events between them, and play them one after another from a numbered list.
RCP opens each routine in its own window inside the main frame. Open as many as you like — File → Open, Open Recent, or double-clicking a .rcp file while RCP is already running all add a routine rather than replacing the one you are working on. Only one routine is ever active at a time, and only the active one can play or drive hardware.
The main reason to do this is copying events from one routine to another. Select events in one routine, copy, click into another routine, and paste — the clipboard is shared across every open routine, and all four paste modes work between them exactly as they do within one routine. This is much faster than rebuilding the same motion twice when two routines share a track layout.
When both routines use the same track layout, preserve tracks, preserve time is usually what you want: the events arrive on the same tracks at the same timecode. If the layouts differ, RCP will tell you when something is about to land on a track driving a different kind of device, or on a track number that doesn't exist in the shorter routine.
Undo is kept per routine, so Ctrl+Z only ever affects the window you are working in.
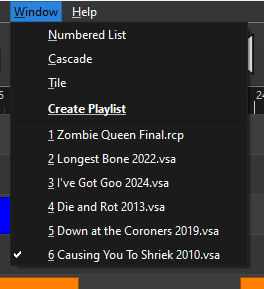
The Window menu
| Item | What it does |
|---|---|
| Numbered List | Shows the active routine on its own, filling the frame. This is the normal working view. |
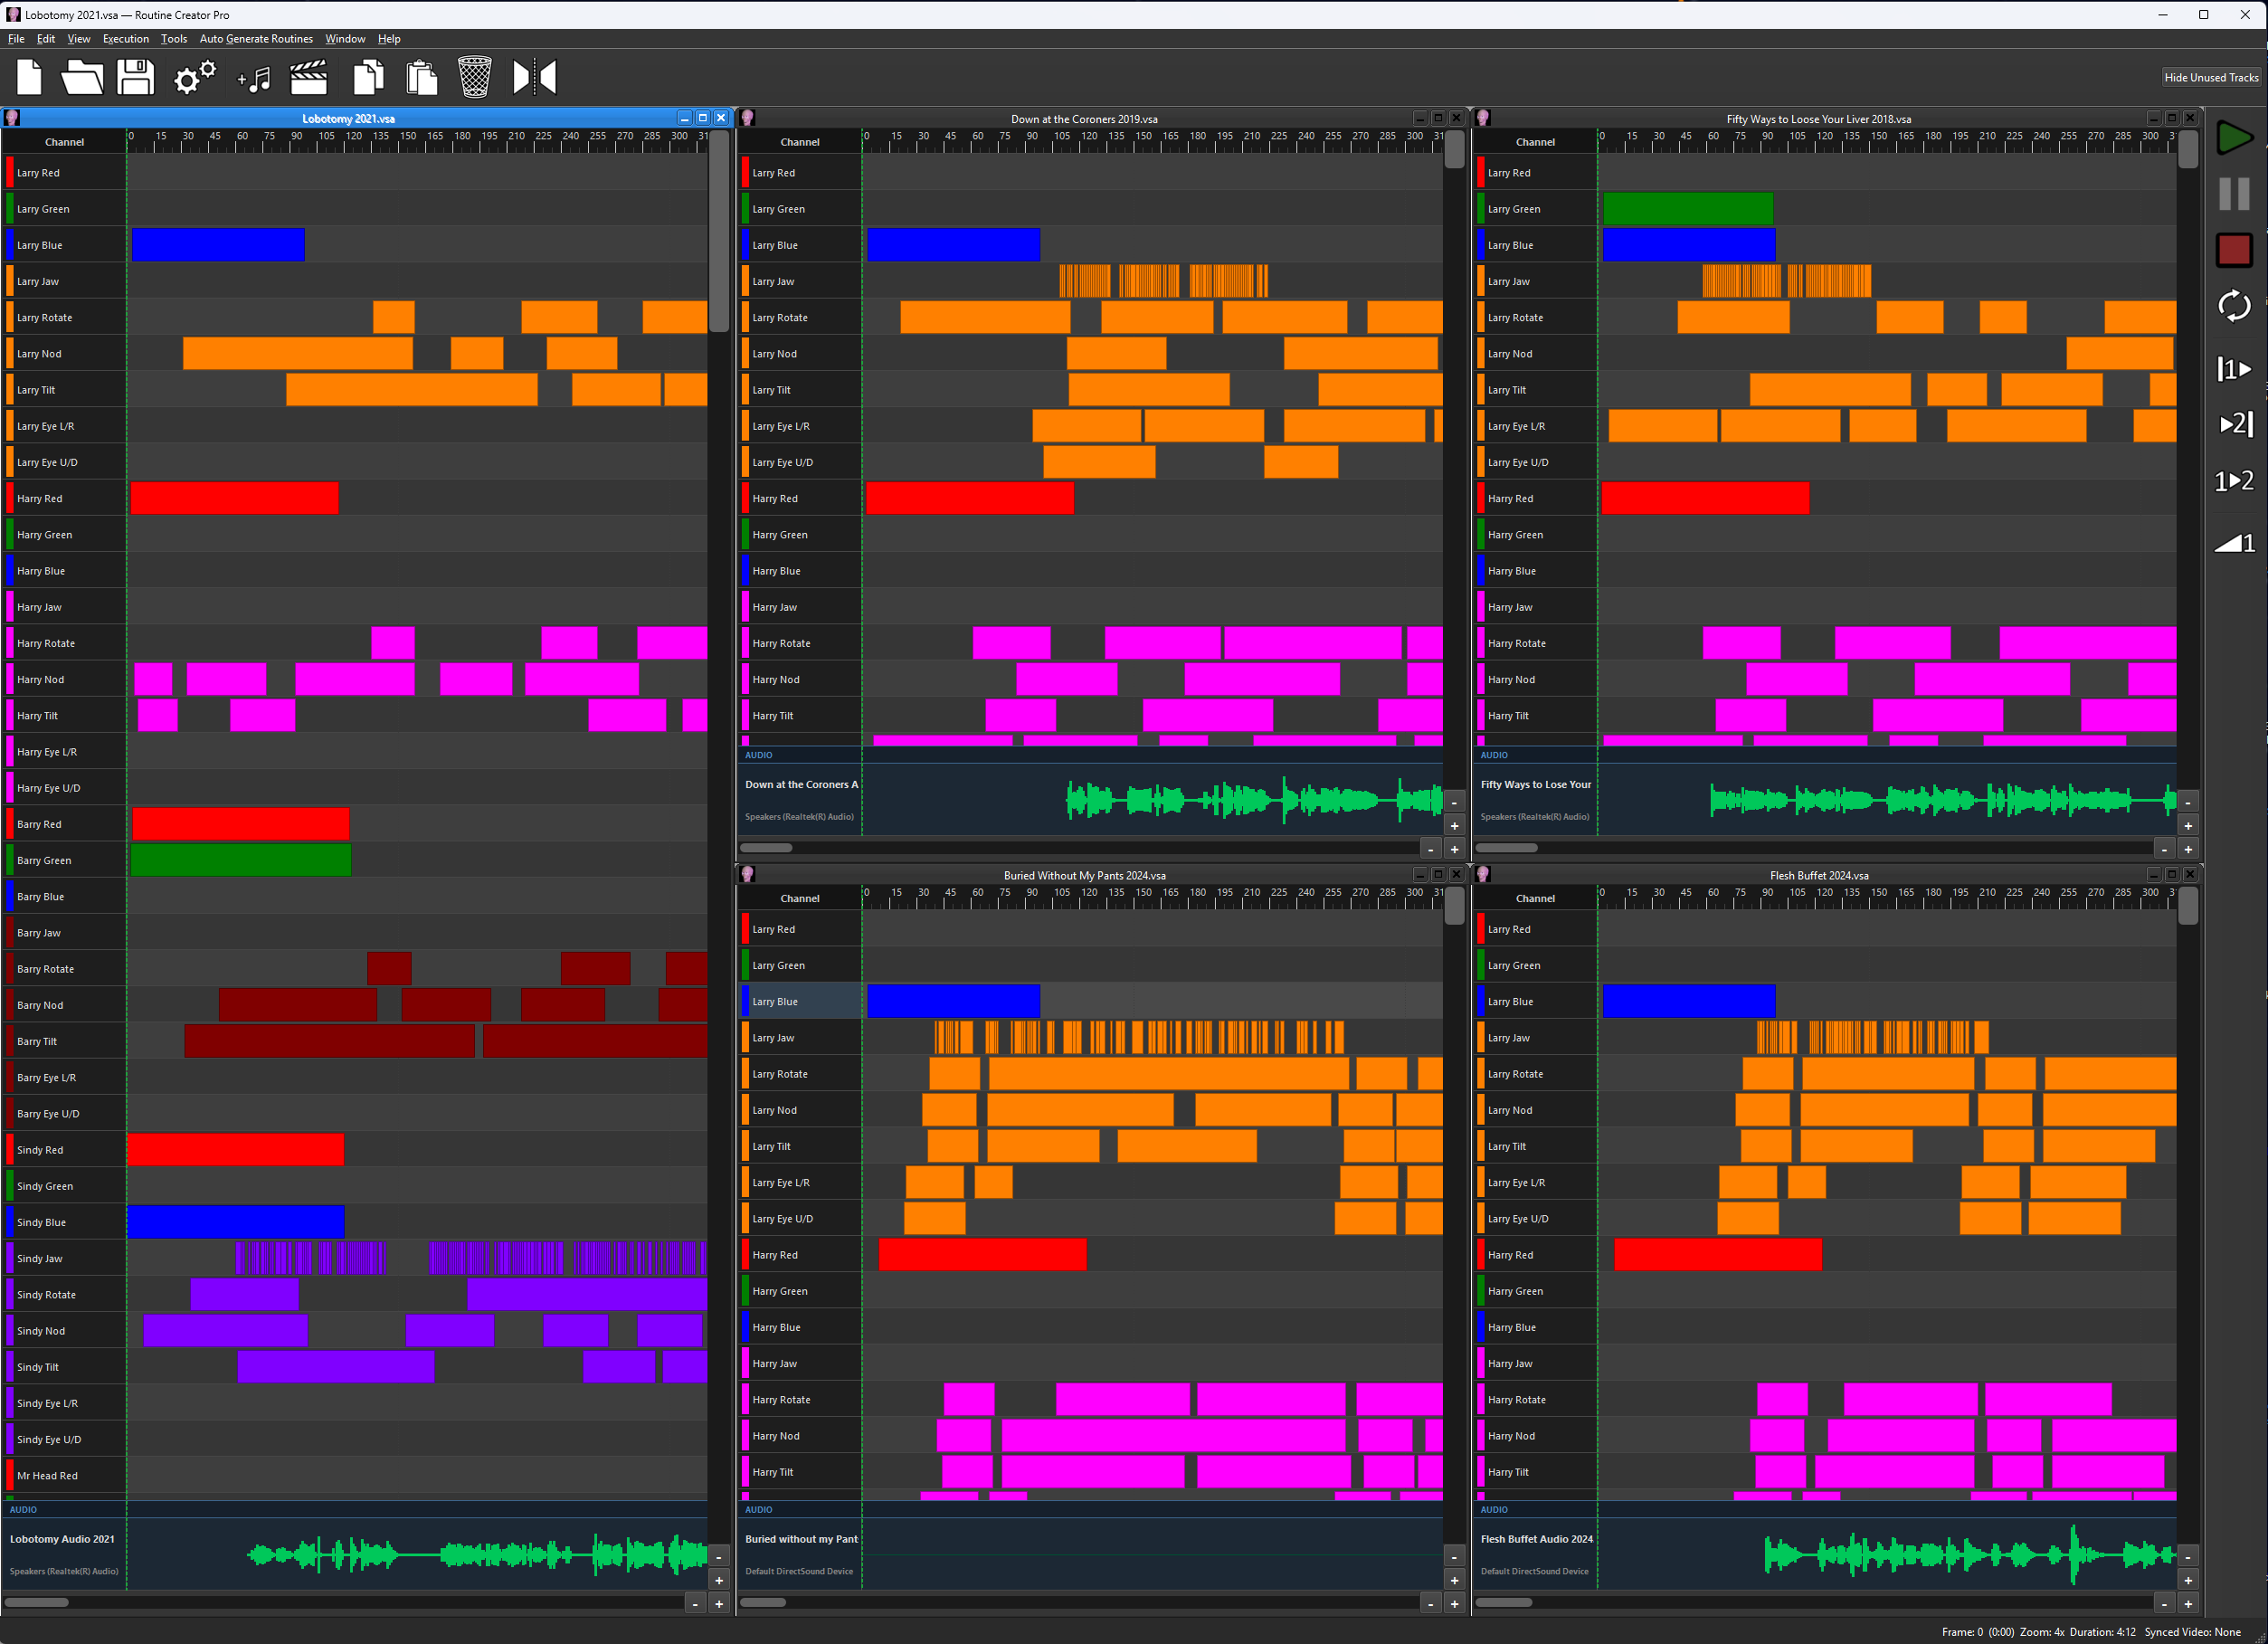
| Cascade | Stacks every open routine in an overlapping diagonal, each sized wide enough to read its timeline. |
| Tile | Arranges every open routine side by side in a grid, all visible at once. |
| Create Playlist | Opens the playlist window described below. Shown as a link, since it opens a window rather than changing a setting. |
| 1, 2, 3… | Every open routine, numbered. Click one to switch to it; a checkmark marks the active routine. |
After a Cascade or Tile you can still drag and resize the windows freely — the arrangement is a starting point, not a lock.
Playing the list in order
Window → Create Playlist opens a small floating window listing every open routine in order. It plays them top to bottom, and that is deliberately all it does: Play, Pause, Stop, Loop List, drag-to-reorder, and a trash button to remove one. Whichever control is currently engaged lights up, so you can see at a glance what the list is doing.
The list and the numbered routines are the same thing seen two ways — dragging a row here reorders the Window menu too. Adding and removing routines is done by opening and closing them; the trash button simply closes the routine you have selected.
With Loop List on, the list returns to the first routine after the last one finishes and keeps going, which is what you want for a show running unattended all evening. With it off, it stops at the end.
Save List… and Open List… keep a show's running order for next time. Save List writes a small .rcplist file with the routines in their current order and the Loop List setting. Open List opens every routine in it, each in its own window, in that order — ready to press Play. If you move the routines to another folder or computer, keep the list file in the same folder as the routines and RCP will still find them. You can also simply double-click a saved list in Windows: RCP opens (if it isn't open already) with the playlist window showing that list, ready to press Play.
Damaged events are removed automatically. Very occasionally a routine file contains junk events that can't be shown on the timeline — on tracks the routine doesn't have, ending before they start, or with positions no servo can reach. They're invisible, but they can make a short routine keep playing for minutes after its last move. When RCP opens such a routine it leaves them out and tells you how many; everything you can see is unchanged. Save the routine to keep it clean. Helmsman ignores the same events.
Missing audio never stops the show. If a routine's audio file isn't where the routine says it is (common after copying routines from another computer), RCP looks for a file with the same name in the routine's own folder and uses it, just like Helmsman. If the audio truly can't be found, the list skips that routine and carries on with the next one, and a small notice (which stays on top but doesn't stop anything) lists every routine it skipped and the audio file it was looking for. The Synced Video Playlist follows the same rule.
There are two loops in RCP and they do different jobs: the main toolbar's Loop replays the current routine, and the playlist's Loop List wraps the whole list. Looping one routine would stop the list from ever advancing, so while the playlist window is open — or a list is playing — the main Loop switches off and greys out. Close the playlist (and stop list playback) and it comes right back.
Once the list is running, the routine that is playing and the one immediately after it are greyed out and marked [playing] and [next]. Everything from the third row down can still be dragged around freely. The next routine is held because RCP is already preparing it — reordering it mid-load is the one thing that could disrupt the run. The locked pair moves down the list as playback advances.
Opening another routine during playback adds it to the bottom of the list in the background without interrupting the show, and removing any routine other than the one currently playing is equally safe. Switching to a different routine by hand does stop playback — that is deliberate, since only one routine can ever be live at a time.
Like RCP's other Playlist (next section), this is a convenience for running routines back to back while you work — not a show-runner. There is a short pause of a couple of seconds between routines while the next one's audio loads. Helmsman remains the tool for running a real show.

Synced Video Playlist
Auto-advancing show-runner for Synced Video routines, built into RCP itself.
If you're not sure what a Synced Video Routine is, It is when you filmed your routine and wanted to display the video along-side the actual skeletons where the Video matches precisely what you are seeing in real time. To make it work, the Video track must be the same length as the Routine and the audio must start at the same time. This playlist eliminates drift that would occur if you simply started play on both files simultaneously.
The Playlist window opens automatically the moment a Synced Video routine loads (toggle it off with the Playlist checkbox on the main toolbar if you're just testing files, not running a show). Drag-and-drop routine and filler-audio files directly into the table to build a running order; drag rows to reorder them (locked once an entry is "Up Next" within 5 seconds, to prevent an accidental last-second reorder).
Load the first routine manually as always (double-clicking it in its folder works, and opens it without any layout question), then press Play — from the main toolbar/menu, Enter, or the Playlist window's own Play button all do the same thing. As long as the Playlist has routines in it, a routine finishing on its own always moves the show on to the next entry. When a routine finishes naturally, its placeholder image shows automatically, a short filler audio clip plays (the one deliberately audible sound in RCP outside your actual show audio), and the next routine loads silently behind it — the instant filler ends, RCP presses Play for you automatically and moves on, with no operator action needed in between. Since Synced Video no longer needs any manual confirmation to engage, a whole playlist of these routines now runs start-to-finish with no operator input required at all.
Right-click any entry for STOP here (pauses the auto-advance chain after that entry — the operator has to press Play manually to continue past it, useful for an intermission or a planned pause) or Remove. Set a placeholder image via Select Placeholder Image… — that's what shows on the second screen during any filler-audio gap between routines. Save/Load a whole running order as a .rcplaylist file to reuse a show's lineup later without rebuilding it by hand each time.
This exists in RCP as an emergency backup path, not the primary way to run a real show — Helmsman remains the intended dedicated show-runner. Use this when Helmsman genuinely isn't available.
3D Preview
RCP has its own built-in, live 3D preview of your cast — View → Show 3D Preview opens a floating window (drag it to a second monitor or make room by re-sizing on a single monitor. This is similar to Virtual Haunt). It renders every character positioned per Scene Map's stage layout, driven by the exact same routine data your real hardware receives: jaw, head rotate/nod/tilt, eyes, and arm lift/twist/elbow are all live as you scrub or play the timeline.
Halloween Skulls hardware flagged in Scene Map automatically gets the correct HS servo-reverse convention applied in the preview, so what you see mirrors real hardware behavior.
A single skull with no Scene Map profile — or your own custom hardware, wired opposite Halloween Skulls' convention — has no per-character setup for that automatic correction to key off. The Reverse Jaw checkbox below the preview window is there for exactly that case: check it if the virtual skull's jaw is opening and closing backwards compared to your real one. Like Servo Calibration below, this is visual-only — it changes nothing about what your real skull actually does; it only corrects which way the 3D model moves so what you see on screen matches what's really happening on stage. Leave it unchecked for any character that already has a real Scene Map profile — it has no effect there either way, since those are already using their own correct setting.

Servo Calibration (Tools → Servo Calibration…) lets you fine-tune how a routine's programmed values map onto the 3D model, per character and servo — pick one, drag a slider until the model matches your real hardware, Apply, Save. This is visual-only: it never touches real DMX/servo output, only how the preview renders.
Live Action — Real-Time Interactive Mode
A live, mic-driven interactive skull — no timeline playback, just a real-time performance running until you stop it.
This is a different mode of operation from everything else in this guide. An operator Speaks into a mic; RCP analyzes it live, drives a jaw track straight to a virtual skull in real time, and sends the same mic audio — delayed and optionally voice-changed — out to a powered speaker behind the skull, timed so the audience hears the line arrive right as the jaw catches up Keeping the jaw in sync with the audio, a feature not found in any other voice to servo boards. To my knowledge this is the only software version of a live talking skull out there which means you don't need to buy any extra hardware to make this work. Open it from Tools → Live Action….
Live Action can also record a session straight into your open routine's real timeline events — head motion, eye aim, and eye LED color all become ordinary Events you can see and edit afterward in the main timeline, exactly like AGR-generated ones. See "Recording a session into your routine" below.

The two modes
- Automatic — the jaw is driven by the mic the same as always; head rotate/nod/tilt wander on their own, semi-randomly, so the skull looks alive even when no one's specifically controlling it.
- Joystick — jaw motion is unchanged, but rotate/nod/tilt come from a joystick instead (a virtual joystick just using your mouse, a real physical USB joystick, or webcam head tracking — see below), so an operator watching a wireless camera feed can aim the skull's gaze at a specific real person in real time. While Automatic is selected and the session hasn't been Started yet, The skull slowly scans the area looking around rather than sitting still. Touching the joystick (Virtual or Physical) takes over immediately ("roaming override") and goes back to the idle wander after 5 seconds of no further input.
Skull config — which hardware this drives
The Skull config dropdown decides where each axis's real DMX address comes from. It offers three kinds of entries:
- Real characters — if a routine is currently open in RCP, its own configured characters appear here automatically, using their own actually-configured hardware (whatever Setup Wizard set up for them). You can also click "Load config from file…" to read a Template or Routine file purely for its addresses, without opening it as the active routine or touching anything else in RCP — useful for running Live Action with nothing else open.
- Halloween Skulls Settings — the default. A fixed Halloween Skulls servo table; see the box below for why one entry covers every board.
- Skulltronix Settings — the same idea for Skulltronix hardware, using Skulltronix's own real address layout and axis names (their "Twist" axis is Live Action's Rotate).
- Serial servo controller — an older serial servo board on a COM port instead of DMX. See "Serial servo controllers" below.

Picking Halloween Skulls Settings or Skulltronix Settings sends the same live values to every board of that same family at once, not just the selected one — whichever board your skull actually is will move, without you needing to know or confirm which.
Real characters are unaffected by any of this — picking one from the dropdown always uses that character's own actually-configured address, exactly as set up in Setup Wizard, whether or not a routine is open or a config file is loaded. Picking a real character is always something you do yourself from the dropdown, never automatic just because the option became available.
Serial servo controllers
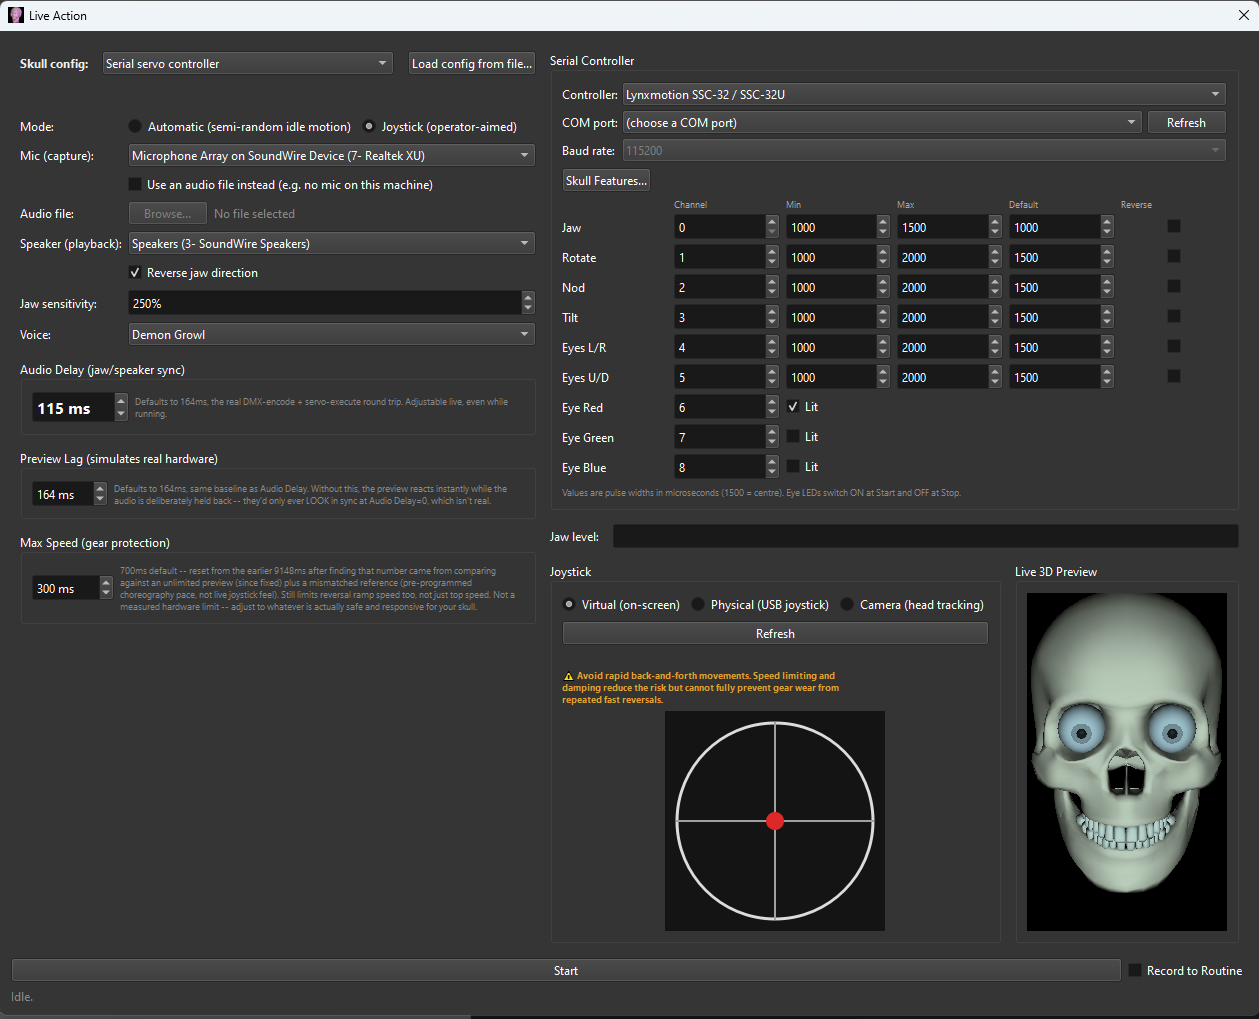
DMX stays the default, and nothing about it changes. If your skull runs on an older serial servo board instead, pick Serial servo controller in Skull config. The Eye Color box is replaced by a Serial Controller section:
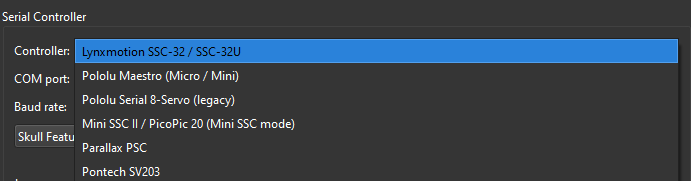
- Controller — Lynxmotion SSC-32 / SSC-32U, Pololu Maestro (Micro / Mini), Pololu Serial 8-Servo (legacy), Mini SSC II (also PicoPic 20 in its Mini SSC mode), Parallax PSC, or Pontech SV203.
- COM port — listed with each device's own description (for example "COM5 — CP2102 USB to UART Bridge"), so you can tell which one is your board. Click Refresh after plugging it in.
- Baud rate — preset to the board's factory default. It must match the board's own setting. It's the same per-port setting Settings uses, so changing it here changes it there too.
- Skull Features… — tick what your skull actually has: Jaw, Rotate, Nod, Tilt, Eyes L/R, Eyes U/D and Eye LEDs. Ticking Eye LEDs offers Single Color or Tri Color. Only ticked features are driven, recorded and saved — a jaw-only skull, or a jaw and rotate only, works fine.
- A row per feature — Channel, Min, Max, Default and Reverse. Picking a controller fills in safe starting values in that board's own units (shown under the rows); they're deliberately a little narrower than the full range so nothing slams into an end stop on the first run. For the jaw, Default is always the closed position, and the jaw opens toward whichever limit is farther from it — usually Min is closed and Max is open, but a jaw that opens toward the lower number works too: just set Default (and Max) to closed and Min to open. That's why Reverse isn't needed for the jaw. The same rule applies everywhere RCP makes jaw motion — Live Action and the Jaw Programmer — on any board, DMX or serial.
- Safety — the number boxes ignore the mouse wheel until you click into one, so scrolling the window can't change a channel or a servo limit by accident. If two features share a channel, both turn red with a note, and Start won't go live until each has its own channel.


Choosing the serial controller puts an empty template in the main window: one track per ticked feature, in the same order the DMX boards use, already set to your board, COM port, channels and ranges. If the file open in the timeline has real work in it, you're asked whether to save it first (Cancel keeps it; the template then appears when you press Start with Record on). Record to Routine works exactly as it does for DMX.
Most of these boards can only switch an output fully on or off, so serial eye LEDs switch on at Start and off at Stop — no fades, no brightness, no colour mixing. With Tri Color, tick Lit on whichever of red, green and blue should come on. Eye LEDs are available on the SSC-32, Maestro and Mini SSC; the other three boards have no on/off output RCP can drive.
Live Action now supports many device types — HalloweenSkulls Servo, DMX Servo, DMX Dimmer, and Relay — because it sends its output straight into the DMX universe, the same path a routine's own DMX tracks use. Legacy serial Controllers are now included in the Live Action feature so you can now choose "Serial Servo Controller" in "Skull config" to set SSC-32, Pololu, Maestro, or Parallax hardware on a COM port will show those specific axes in a popup displaying all the settings that you will need to set to match you skull settings.
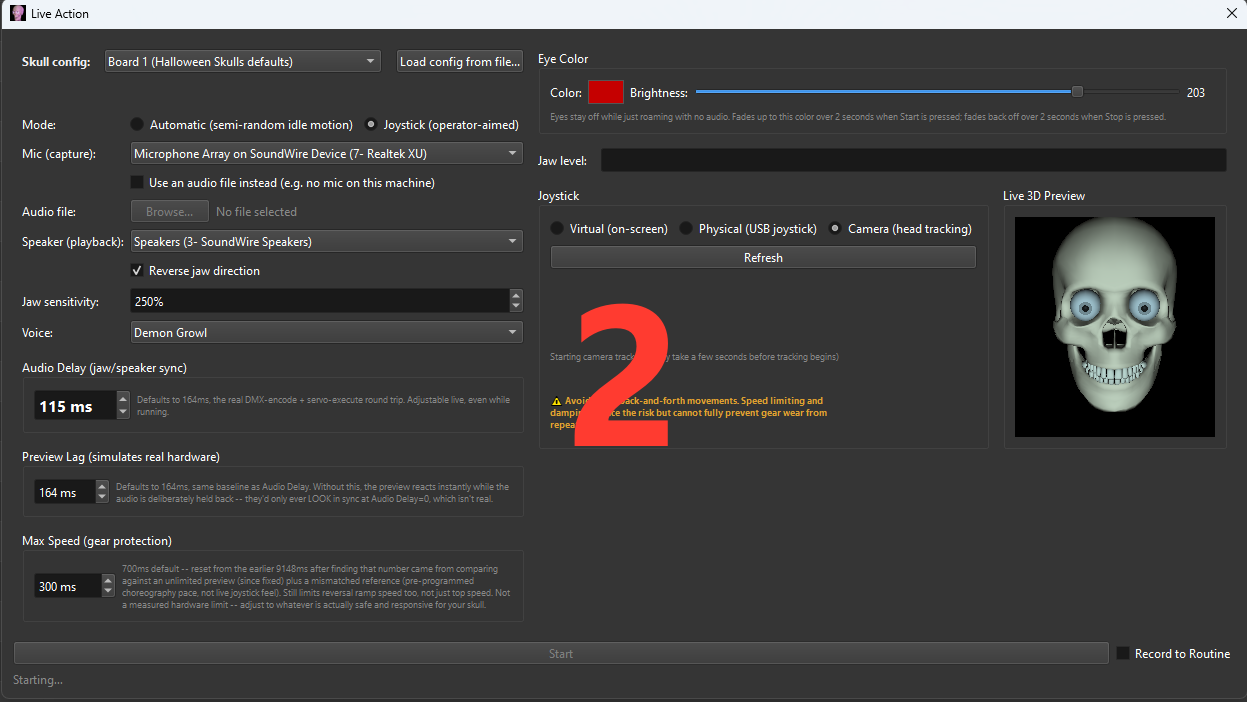
Eye color
Pick an LED eye color from the color swatch, and set overall Brightness (0–255, scales all three color channels together). The eyes stay off while the skull is just idling/roaming with no session running; the moment you press Start, they fade up to the chosen color over 2 seconds, and fade back down over 2 seconds once you press Stop — the fade-down genuinely keeps animating for its full 2 seconds even after Stop, it doesn't cut off instantly. If you're recording (see below), both fades are captured as real events too — one fade-up event at the start of the recording, one fade-down event at the end — not just shown live and then lost.
Recording a session into your routine
Check Record to Routine, next to Start, and everything you do live gets written into the currently open routine as real timeline Events once you press Stop — this is what lets Live Action fully replace hand-puppeteering-and-hoping: perform it live once, then fine-tune the resulting events afterward exactly like any other track. You need to have a template loaded that matches your skull unless you choose Halloween Skulls Settings or Skulltronix Settings. A source loaded purely via "Load config from file…" can't record, since there's no real open routine or template to write events into.
- Head motion (Rotate/Nod/Tilt/Eyes L-R/Eyes U-D) is captured continuously and segmented into a clean set of events once you stop — the same already-smoothed, gear-protected motion you saw live, not a raw noisy trace.
- Eye LED color becomes a fade-up event at the start and a fade-down event at the end, matching exactly what you saw fade on screen.
- Jaw is handled differently, on purpose. Your raw mic audio is saved as a new audio file on the routine, and the moment you stop, RCP automatically runs the same proven Jaw Programmer algorithm (see above) against that saved file — using whatever Volume/Compression/Smoothing you last had set in the Jaw Programmer dialog — to generate the jaw track. This gives the recorded jaw the same real range of motion as running Jaw Programmer by hand would, rather than trying to capture and smooth a live envelope in a way that could never quite match how it actually sounded live. If the recorded jaw feels short on range of motion, open Jaw Programmer once, raise Volume to compensate for a quiet mic source, and it'll be used automatically next time.
Pressing Start always shows a large on-screen countdown (centered over the window, high-contrast red-on-dark with a yellow border) before anything actually goes live — a beat to get your hand on the joystick or your mouth near the mic before real output begins. This happens every time, whether or not you're recording.
The first time you press Start after picking a real character or a loaded config file (never for Halloween Skulls Settings or Skulltronix Settings — those are known-safe hardcoded profiles), a confirmation dialog lists exactly which axes and DMX addresses are about to go live and asks you to confirm your real skull matches. It only asks once per selection — switching sources re-arms it, but Stop/Start on the same source won't nag you again.



Setting up a session
- Pick a Skull config entry (see above) and confirm the mode (Automatic or Joystick).
- Pick a capture device (your mic) and a playback device (the speaker behind the skull). If you don't have a physical mic available on the machine you're running this on, check "Use an audio file instead" and browse to a voice recording — This is also a way to create an entire single skull routine. Load the jaw track move the skull with any method, and record the result.
- In Joystick mode, choose Virtual (on-screen), Physical (USB joystick), or Camera (head tracking) — see the joystick section below.
- Set Audio Delay — how long the mic audio is held before it reaches the speaker, compensating for your real DMX/servo round-trip latency (the same number the Jaw Programmer's own 164ms offset correction is built around). Preview Lag is a separate control, right next to it: it holds back only the on-screen 3D preview by the same idea, simulating how long it actually takes real hardware to visibly react to a DMX command — keep these two roughly matched if you want what you see on screen to line up with what you'd hear/see from real hardware.
- Pick a Voice Changer preset if you want one (Off, Deep/Monster, Small Creature, Robot, Demon Growl). If your on-screen preview's jaw looks like it's moving backward compared to your real skull, check Reverse jaw direction — this only ever affects the preview, matching it to what your real hardware is already doing; it never changes the actual signal sent to the real skull.
- Check Record to Routine if you want this session written into your open routine's timeline (see above).
- Press Start, wait through the countdown. The jaw meter shows live mic level; the embedded 3D preview shows exactly what the skull is doing, whether or not any real DMX hardware is even connected.
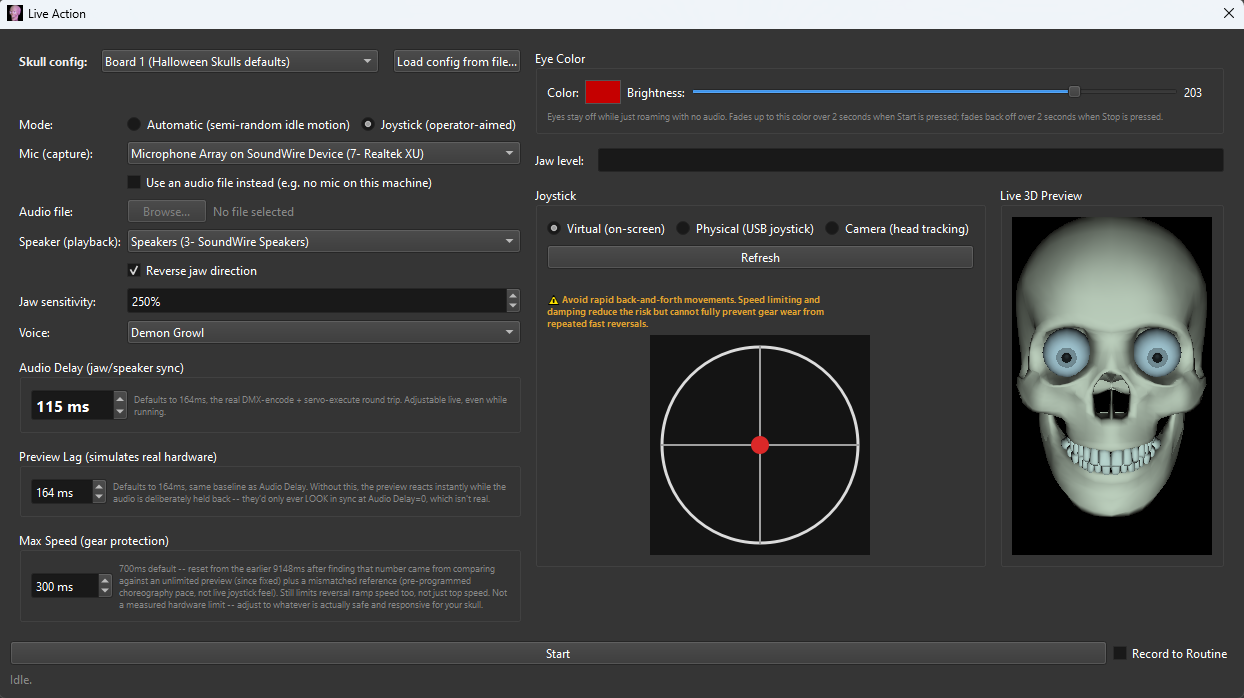


Joystick — on-screen, a real physical USB joystick, or your webcam
Choose Virtual (on-screen) for the built-in mouse-driven joystick, or Physical (USB joystick) to read an actual joystick — a device dropdown with a Refresh button appears, listing every joystick Windows currently sees. X/Y drive Rotate/Nod exactly the same way the on-screen joystick does, including the same gear-protection speed/damping limits. If the device has a twist/rudder axis (e.g. a flight-stick-style joystick like the Logitech Extreme 3D Pro), it drives Tilt directly — a more natural match than the diagonal-drag trick the on-screen joystick uses, since a mouse has no twist axis of its own. A plain two-axis stick with no twist grip still covers all three — Tilt automatically falls back to that same diagonal-drag math (how far you push into a corner), so a simpler, cheaper joystick works just as completely as one with a dedicated twist axis.
Choose Camera (head tracking) to aim the skull with your own head instead of a joystick — a bundled webcam-tracking helper watches your face and Rotate/Nod/Tilt all follow your own head movement directly (tilt included, unlike the joystick sources' diagonal-drag approximation). Nothing to install separately; if no webcam is available or tracking can't start, a note appears explaining why and the skull simply stays centered rather than reacting to nothing.
Testing without a physical microphone
Check "Use an audio file instead" and browse to a voice recording (WAV works best — RCP checks a WAV's real channel count and averages a stereo file down to mono itself rather than trusting a generic automatic downmix, which real testing found could distort the signal on some files). The file plays through the exact same analysis/delay/voice-changer pipeline a live mic would, once through start to finish, then the session ends on its own — load a new file or switch back to Live Mic to continue, it won't loop automatically. This is a genuinely useful way to rehearse jaw response and dial in Audio Delay/Preview Lag/Jaw Sensitivity before ever plugging in a real mic.
Gear protection
Max Speed caps how fast Rotate/Nod/Tilt are allowed to move (fastest allowed edge-to-edge sweep time) and adds damping against rapid direction reversals, so a fast joystick flick — physical or on-screen — or a fast automatic wander can't slam a servo straight to an extreme or whip it back and forth. This applies to every mode and every joystick source equally. No amount of software limiting can fully protect against a determined, continuous rapid wiggle; the on-screen warning next to the joystick says so directly. Set this to whatever your own servos can actually tolerate — the shipped default is a starting point, not a measured spec for your hardware.
Skull config selection, mode, device choices, joystick source, Audio Delay, Preview Lag, voice preset, Reverse jaw, Jaw Sensitivity, Max Speed, and eye color/brightness are all remembered the next time you open the dialog. The loaded test audio file is deliberately the one exception — it's never auto-reloaded, so you always start a fresh session by picking on purpose.
Every part of Live Action has now been run against real equipment: a real skull over real DMX hardware, a real microphone, a real physical USB joystick, and Camera (head tracking) against a real webcam and a real skull. Jaw response, eye LED color/fade, head motion, the full Record-to-Routine capture-and-generate pipeline, and all three joystick sources (Virtual/Physical/Camera) are confirmed working.
Hardware, Relays & Video
What's real on the wire today, the new unified Relay type, migrating an old routine to a new controller, one-shot video effects on the timeline, and a whole-show background video locked to your audio.
Supported controllers
The Settings → Device Settings Type dropdown lists the device types RCP can actually drive today: DMX Servo, Relay, DMX Dimmer, HalloweenSkulls Servo, SSC-32 / SSC-32U Servo, Pololu Servo, Maestro, and Parallax Servo. A Legacy Devices ▶ submenu off the same Type button additionally offers MiniSSC Relay, Maestro Relay, SSC-32 / SSC-32U Relay, and (added 2026-08-07) SV203 Servo, K108A Relay, and SMI Motor — real, working options for older boards, once their real protocols were tracked down from surviving manufacturer manuals (see below). Structurally-incompatible or unrecovered-protocol types (LPT, PicoPic, EnduranceRC) still aren't offered for a new track — but a routine that already used one still opens and saves correctly, and can be migrated forward with the converter below. EnduranceRC specifically stays RCP-only-as-metadata by design: it plays back correctly in Helmsman for old shows, but RCP deliberately never gains real EnduranceRC output, so a new routine can't be authored against it here.
Serial boards talk exactly the way Helmsman talks to them
RCP sends every serial board (SSC-32 / SSC-32U, Mini SSC, Pololu, Maestro, Parallax, SV203) the same bytes, at the same speed and with the same port settings, as Helmsman — the player those boards are proven to work with.
Connection speed (baud rate). Each COM port uses, in this order: the speed you set for it in Settings → right-click the Port column → Set Baud Rate; otherwise the speed saved in the routine file for that port (the same one VSA and Helmsman use); otherwise 9600 (Parallax: 2400). The SSC-32 and SSC-32U are one entry each now — if your board is jumpered or set to a different speed, just set it once with Set Baud Rate. When you save, RCP writes the speed it actually uses into the file, so the same routine plays in VSA and Helmsman too.
SSC-32: one command per servo (#0 P1500), exactly as Helmsman sends it. If the board's connection is still busy sending the previous moment, RCP skips ahead to the newest positions instead of letting motion fall behind.
Maestro: positions are in microseconds (500–2500, centre 1500), the same as VSA and Helmsman; routines saved by older RCP versions are converted automatically when opened.
Which COM port is my board? Find My Serial Boards
Windows only shows the USB chip on a servo board ("USB Serial Port"), never the board's name, and the COM number changes from one computer to the next. Instead of unplugging devices one at a time to see what disappears, click Settings → Device Settings → Find My Serial Boards….
RCP asks each COM port which board is on it. A Lynxmotion SSC-32 / SSC-32U answers with its name and the speed it's set to, and RCP remembers that board (by its own USB serial number, so it's recognised on any COM number) and uses that speed from then on. Pololu Maestro boards name themselves to Windows already. From then on the Port lists show the board's name, e.g. COM5 — Lynxmotion SSC-32U, and if this routine's SSC-32 or Maestro tracks point somewhere else, RCP offers to switch them to the board it found.
It's safe to run with your show connected: ports that are DMX or Halloween Skulls adapters are skipped without being touched, and the only thing sent to the other ports is a "who are you?" question. Close VSA and Helmsman first — only one program can use a port at a time. Older boards (Mini SSC, Parallax, SV203 and others) can't answer that question; they show in the Port list with the board type you've assigned to them.
Routines travel between computers but COM numbers don't: when you open a routine whose SSC-32 or Maestro tracks use a port that isn't your board on this computer, RCP offers to move them to where the board actually is.
Parallax Servo Controller / PSC-USB
Parallax Servo now sends real commands — previously picking it did nothing at all. Works with both the original serial PSC and the PSC-USB (#28823), since they speak the same command language over whichever connection your board actually has.
SV203, K108A, and SMI Motor — three more old boards brought back to life
Three older controller families gained real output on 2026-08-07, once their genuine wire protocols were tracked down from surviving manufacturer documentation rather than guessed at:
- SV203 Servo (Pontech SV203/SV203B/SV203C) — plain ASCII commands (
BD0 SV1 M150-style), confirmed against the surviving V1.20 manual. Position range is 1-255 with 128 as center, matching the board's own documented scale. - K108A Relay (Ozitronics/KitsRUs K108/K108A) — 8-relay ASCII on/off commands, confirmed against the original K108 and K108U manuals. Works exactly like the other relay types above: pick the type, RCP fills in correct Min/Max/Default, events just toggle.
- SMI Motor (Mondo-tronics Serial Motor Interface #3-511) — drives two brushed DC motors per board. Turns out to use the exact same 3-byte wire packet as MiniSSC, just with motor-band values instead of servo position (0=coast/stop, 1-31=reverse, 32=brake-stop, 33-63=forward) — RCP's Min/Max/Default for this type are set to that real safe range, not a generic 0-255 guess.
All three are built directly from surviving manufacturer manuals, not guessed at, and compile/run cleanly — but none of this project's own hardware happens to be SV203/K108A/SMI, so none have had a live confirmation pass yet. Flag it here if any of these don't behave as expected on first real use.
The unified Relay type
Pick Relay as a track's Type and RCP fills in Min/Max/Default for you — you only ever think in plain on/off. Behind the scenes it sends real DMX values that avoid the true 0/255 endpoints some relay boards treat as ambiguous. On a Relay track, just creating a new event toggles it: the first one turns it on, the next turns it off, alternating — you never enter a value by hand. The event's box can be drawn as long as you like for visibility at any zoom level; only the moment it starts matters, since the relay holds whatever state it was last set to until the next event changes it.
Don't have a DMX adapter? MiniSSC Relay, Maestro Relay, and SSC-32 / SSC-32U Relay, under Type → Legacy Devices, drive a relay over those boards' own serial connection instead — real on/off thresholds/commands matching each board's actual spec, not a guess (the SSC-32 pair uses the board's real Discrete Output command, straight from the manual — a genuinely different command from a servo move, not a repurposed pulse width). All of these work the same way as the unified Relay type above: pick the type, RCP fills in correct Min/Max/Default, events just toggle.
MiniSSC Relay and Maestro Relay are both confirmed working with real relay hardware. SSC-32/SSC-32U Relay is implemented against the board's real documented Discrete Output command, not a guess, and compiles/runs cleanly — but hasn't had a live confirmation pass against real SSC-32 hardware yet. The same goes for the new Mini Maestro group-move command and Parallax Servo support: both are built directly from the manufacturers' own real documentation, not guessed, but neither has been run against real hardware yet either. Flag it here if any of these don't behave as expected on first real use.
Convert Controller Type
Tools → Convert Controller Type… migrates an old routine built for one controller onto a new one — for example, an old SSC-32 show (500/1500/2500 pulse widths) moving to DMX (250/750/1250). Pick the type you're converting from (every historical type is listed, even the retired ones — this list is just choosing which tracks to touch) and the type to convert to (current types only). Every matching track's events are rescaled using that track's own already-configured Min/Max as the source range, so a servo you've already fine-tuned converts correctly instead of snapping to a generic default.
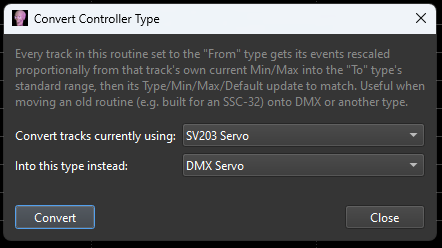
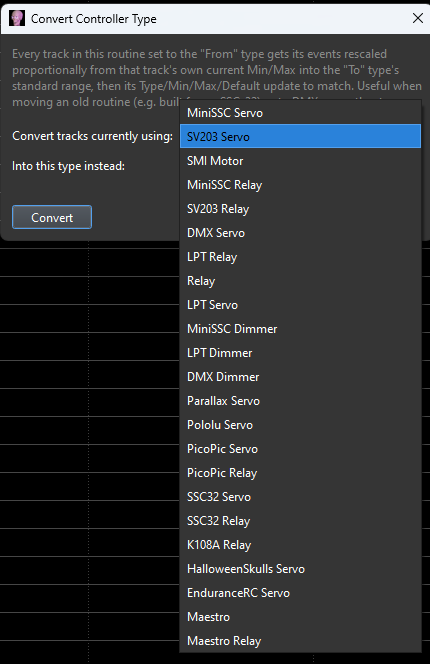
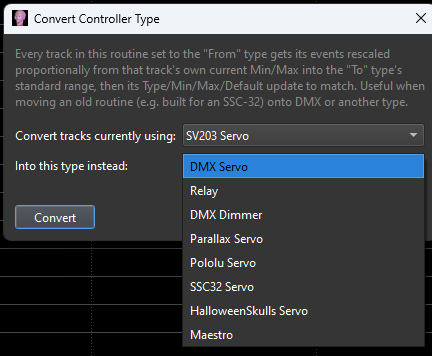
Bandwidth Test
Tools → Bandwidth Test checks whether your currently configured devices can actually keep up with RCP's 30 fps timeline — not a live hardware probe, a computed check against the routine's own device/port configuration. Two things get checked:
- Legacy serial ports (MiniSSC, Pololu, Maestro, SSC-32/SSC-32U, Parallax) — worst case, every channel on that port changing in the same frame, against what the port's baud rate can actually transmit inside one frame. A "may lag" result doesn't necessarily mean you'll ever notice it — typical playback moves far fewer channels at once than the worst case this checks for. If a port is ever too busy, RCP skips ahead to the newest positions rather than letting motion fall behind.
- DMX addressing — overlapping or out-of-range channel assignments across your DMX/HalloweenSkulls Servo tracks, a real correctness problem (two tracks silently fighting over the same channel) rather than a speed one.
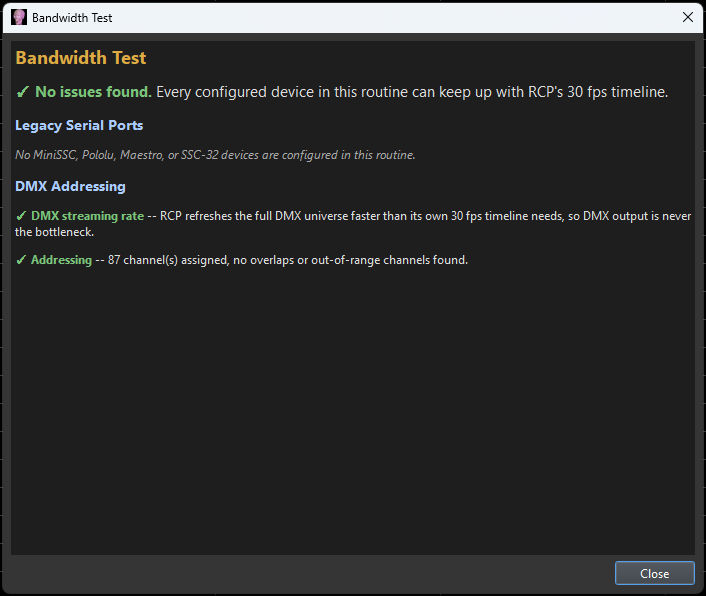
Video effect clips
Short, one-shot video effects on the timeline — a lightning flash, a jump scare. In RCP's own words, right in the Add Video Clip dialog: "Fires once, like a jump-scare or lightning flash — not synced to audio." It plays once when the playhead reaches it and runs through to its own natural end. Add the first one via Tools → Add Video Track…; after that, a persistent Video Tracks panel appears at the bottom of the timeline, one strip per clip, working the same way the Audio Mixer's tracks do (the panel itself is invisible until at least one clip exists, which is why the Tools menu entry point exists).

Each strip has a color swatch, the clip's name, live Mute and 🔒 Lock buttons, a Volume slider (0–100%), and a screen-picker button showing which monitor the clip targets. Drag the clip's bar left or right along the timeline to move it — it snaps to frame 0 and to the playhead, and double-clicking it resets it back to frame 0. Drag a strip's name area (or right-click it) to reorder tracks, exactly like reordering audio tracks. Right-click also offers Edit… (change the file, initial screen, or start frame) and Remove Track.

- A video file already edited the way you want it —
.mp4,.mov,.avi,.mkv,.wmv, or.m4v. There's no in-app trim or fade for these clips: if you're bringing video into RCP, you're expected to have already cut it the way you want it in a real video tool first. - A screen for it to appear on — RCP lists every monitor Windows currently sees.
These clips are deliberately simple: they are not synced or drift-corrected against your audio track — that's a different, harder job, covered next. Two clips can play at the same time on different screens with no restriction, but per the dialog's own rule, "two clips can't target the same screen at overlapping times" — RCP blocks the save and names the clip it collided with, since one monitor can't show both at once.
Synced Whole-Show Video
A single full-length background video — a pre-rendered 3D environment, a looping backdrop, whatever your show needs — that plays for the whole routine, with its own embedded audio as the show's only sound. This is a different, harder problem than the effect clips above: it isn't manually placed on the timeline at all. RCP finds it automatically from a simple file-naming convention and keeps it in sync on its own, perfectly, for the length of the whole routine — because there's nothing to compare against and correct anymore. The video's own playback position is the show's clock, directly, for everything: DMX, servo/arm movement, all of it. No separate audio file, no two clocks that could ever drift apart in the first place.
- Two files, same name, same folder — only the extension differs: your routine (
MyShow.rcp) and a video file (MyShow.mp4, or.mov/.avi/.mkv/.wmv/.m4v). - The video's own embedded audio becomes the entire show's sound. If the routine also links an audio file (for example the same-named
.wavfrom older shows), RCP simply ignores it while the video is in charge — whether that file exists or not — so you never hear the song twice. The link stays in the routine; switch Synced Video off for that routine in Synced Video Settings and its audio comes back. - The video is used even if the routine runs a few seconds longer than the video: the routine finishes at whichever comes later, the end of the video or the last programmed event.
- A routine with no same-named video plays normally with its own audio, and the show screen shows your placeholder image — handy for a sneak preview of a routine whose video isn't finished yet. Video and non-video routines can sit in the same folder; RCP decides routine by routine.
- RCP re-checks for this pair every time the routine is opened and turns sync on automatically — there's nothing to confirm or turn on by hand as long as the files are named and placed correctly. Renaming or removing the video file locally is a normal, deliberate way to opt a copy out of synced playback, e.g. while editing away from a show computer.
- A second monitor for the full-screen output. On a single-monitor machine, the Synced Video Preview window (below) opens itself automatically instead and becomes the only place you'll see the video.
Once detected, a status bar button appears at the bottom of the window — 🎬 Synced Video: filename → screen name — click it to open Synced Video Settings, where you can turn sync off for this routine or override which screen it targets. Everything else, including keeping picture and sound in sync, is fully automatic and needs no attention during a show.
4K video: the same window has Draw video with the graphics card (smoother 4K), which applies to every routine on this computer. With it off, the computer's processor prepares every frame before drawing it — fine for 1080p, but too slow for 4K on many computers, so the picture looks choppy and runs a little behind the sound. With it on, the graphics card draws the frames directly. It's the same player and the same clock either way, so the skeletons stay in sync exactly as before; only the picture changes. It takes effect immediately — try it with one of your 4K routines before a show.

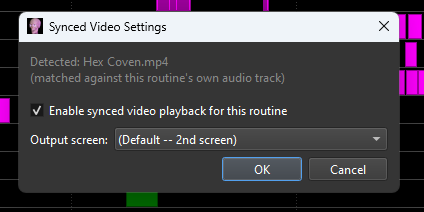
The Synced Video preview window
A resizable window, pinned to RCP's own screen, showing exactly what's playing full-screen on the target screen — literally frame-identical, not just close, since both come from one shared decode pipeline rather than two separate video players. Turn it on/off by hand any time via View → Show Synced Video Preview.
A dropdown in its bottom-right corner switches between two modes:
- Show Mode (the default) — a small fixed-size overlay tucked into the corner of your screen, meant for an operator to glance at during a real show while the real output plays full-screen on Screen 2.
- Edit Mode — for editing without a Screen 2 attached at all, e.g. on a laptop. Resize and move this window however you like; RCP remembers its size and position from then on instead of resetting it back to the small corner box every time you open a routine.
On a single-monitor machine, this window now opens itself automatically the moment a Synced Video routine is active — you don't need to reach for the View menu first, since without Screen 2 this is the only place you'll see the video at all. On a real show rig with Screen 2 connected, nothing changes: it stays off unless you turn it on yourself.

If synced video is enabled but RCP can't find any screen besides its own, you'll get a loud pop-up warning, not just quiet status bar text — this condition is a real troubleshooting signal during real show setup (almost always a bad cable or a monitor that didn't wake up), so it's deliberately hard to miss. If you're intentionally working on one monitor on purpose (e.g. servo/arm calibration at a desk), this is expected and fine — dismiss it and keep going; the preview window opens itself automatically and shows real, live frames the whole time.
This feature exists in RCP as an editor/preview tool and an emergency backup path — not as a replacement for Helmsman, which remains the dedicated show-runner for actually operating a real haunt. If you're running a live show, Helmsman is still the intended primary player.
Exporting: VSA, xLights and CSV
A routine is saved as an .rcp file, which VSA and Helmsman can already read. When you need another format:
- File → Export as .vsa… — a plain VSA copy of the routine, for VSA itself or for anyone who needs the
.vsaextension. - File → Export to xLights (.fseq)… — the routine as an xLights sequence: every DMX channel's value on every frame, at the same DMX addresses your hardware uses. In xLights, set up models at those same addresses. Save the routine first; the export is a copy.
- Tools → Export as CSV… (F4, the same key as VSA) — a spreadsheet of every frame's position for the tracks you pick. Include Initial Positions adds a first row with each track at its Default; Sparse Data Output writes
-1where a track has no event instead of repeating its last position — both work exactly like VSA's own options. - File → Package Routine for Sharing… — gathers the routine and the files it uses into one package to send to someone else.
Settings — Every Tab, Every Choice
A complete reference for every tab, column, and menu inside Settings. Most of it you'll only ever touch once per hardware setup — Setup Wizard and Templates are already covered in "Building a Character Template" — this section exists to have every single control in one place.
Open Settings from Tools → Settings… or the gear icon on the toolbar. It has six tabs: Device Settings, Tracks, Timing, Port, Audio, and Program. Export Defaults… sits bottom-left on every tab; OK/Cancel sit bottom-right — nothing on any tab is written back to the routine until you click OK, and Cancel discards everything you changed in this session, including a pending Clear All Tracks.
Writes Documents\VirtualHaunt\rcp_defaults.txt — port configuration, every track's skull/feature/reverse mapping, and Scene Map stage positions — for the separate, standalone VirtualHaunt app to read on its own next startup. It's manual-only, not automatic on every save: click it right before you plan to use standalone VH, once your track layout and Scene Map are the way you want them.
Device Settings — the track table
One row per track, in the fixed, permanent order they were first created in (see "Track order is permanent" earlier). Setup Wizard…, Create Template, Select Template…, and Find My Serial Boards… (finds which COM port each servo board is on and names it in the Port lists — see Which COM port is my board?) sit above the table — Setup Wizard and the template workflow are both covered in full in "Building a Character Template"; the template-match indicator to their right tells you when the current track layout's addresses match a saved template closely enough (90% or more) to be considered the same hardware setup.
| Column | What it controls |
|---|---|
| Enable | Whether this track's events actually output anything during playback. A disabled track keeps all its data — nothing is lost, it's just silenced. |
| Track | Read-only track number (1-based). |
| Name | Editable text. Follow the [Character] [Function] convention so AGR and every other automatic-detection feature can recognize what the track is for. |
| Type | Which controller protocol drives this track — see below. |
| Port | Which COM port (or DMX adapter) this track's Type sends its output over. |
| Addr | The channel/address on that port, numbered from 0 exactly as VSA numbers it, so a familiar routine looks the same here as it always did. |
| DMX | Read-only: the same channel as a DMX channel number (Addr + 1). Real lights, fog machines and other fixtures are set by this number. Hover over Addr or DMX to see which card and channel it is, e.g. "Card 8, channel 29 of 32". |
| +Value / -Value | This track's real max/min travel — the physical safe range for this specific servo or fixture. RCP never sends anything outside it, on any track, during playback, previews, ramps or Live Action — even if events were programmed further. Change the values at any time; the new limits apply immediately, and widening them again brings the original programmed motion back (the events themselves are never changed). |
| Default | Rest/idle position — where the track sits with no event active. |
| Color | This track's color on the timeline. Click the swatch to change it. |
Double-click any Addr, +Value, -Value, or Default cell to type an exact number (0–2000) instead of editing in place.
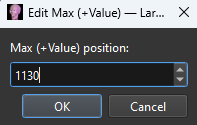
Reserved addresses — Halloween Skulls and Skulltronix cards
Animatronic control cards take their configuration commands on some of their own DMX channels. Anything else sent there — a light, a fog machine, another servo — reaches the card as a command and can make it misbehave, change its settings, or stop responding altogether. These addresses are not spare channels: never put anything on them.
- Halloween Skulls cards: every card uses a block of 32 channels, and the last four of each block are its configuration channels (Command, Data 1, Data 2, and a 32nd that must always be 0). The channel just before them is the card's eye strobe, a one-channel LED dimmer.
- Skulltronix boards (BoC and SoC): DMX 1–7 (Addr 0–6) are where their configuration program stores settings, for the whole DMX line — Skulltronix says no device on the line should use them.
RCP protects only the cards your routine actually uses: a Halloween Skulls card counts when one of its characters is marked as Halloween Skulls hardware in the Scene Map, or when its tracks have the Halloween Skulls layout. Blocks you use only for lights are left alone.
| Halloween Skulls card | Reserved Addr (as in VSA / RCP) | DMX channels |
|---|---|---|
| 1 | 28, 29, 30, 31 | 29–32 |
| 2 | 60, 61, 62, 63 | 61–64 |
| 3 | 92, 93, 94, 95 | 93–96 |
| 4 | 124, 125, 126, 127 | 125–128 |
| 5 | 156, 157, 158, 159 | 157–160 |
| 6 | 188, 189, 190, 191 | 189–192 |
| 7 | 220, 221, 222, 223 | 221–224 |
| 8 | 252, 253, 254, 255 | 253–256 |
| 9 | 284, 285, 286, 287 | 285–288 |
| 10 | 316, 317, 318, 319 | 317–320 |
| 11 | 348, 349, 350, 351 | 349–352 |
| 12 | 380, 381, 382, 383 | 381–384 |
| 13 | 412, 413, 414, 415 | 413–416 |
| 14 | 444, 445, 446, 447 | 445–448 |
| 15 | 476, 477, 478, 479 | 477–480 |
| 16 | 508, 509, 510, 511 | 509–512 |
| Skulltronix (whole line) | 0–6 | 1–7 |
In Settings: an empty leftover track sitting on a protected address (for example a "Device #29" from a VSA template) is shown as a locked grey HS Reserved row (Skulltronix Reserved for DMX 1–7) that can't be edited. A real track on one is marked red until it's moved, a protected address can't be typed into any track, and OK is refused while an enabled track still sits on one. Setting a HalloweenSkulls Servo on a card's eye-strobe channel gets a warning too — a servo uses two channels, so its second one would land on the card's Command channel.
Opening an older routine with tracks on protected addresses lists them, with two choices:
- Auto-move to next available addresses — each track goes to the next free address outside every card's block, and lights that use several channels (R, G, B, W…) move together. An eye strobe that was set as a HalloweenSkulls Servo by mistake isn't moved: its Type becomes DMX Dimmer where it is. The list shows every track's old and new Addr and DMX numbers — set each real fixture to its new DMX address to match; nothing is saved until you save the routine.
- I will manually change the addresses — nothing is changed; fix them in Settings.
Closing the message with the X also leaves everything as it is. Either way, while a track still sits on a protected address RCP sends nothing to it — those channels always go out as 0, the card's "no command" value. Helmsman (3.3.26 and later) does the same when it plays the routine.
Halloween Skulls and Skulltronix in one routine (very rare): RCP changes nothing and blocks nothing — it shows a warning with every reserved address for every card in that routine and the track on each, and Open Printable Chart opens it in your web browser to print. Real damage can occur to real hardware if this is not corrected. A Halloween Skulls card set to board 1 uses DMX 1–32, so it can't share a DMX line with Skulltronix boards at all: set it to another board number with HS_Config first.
The Type column — every device this build can drive
Click a row's Type button for a menu of DMX Servo, Relay, DMX Dimmer, HalloweenSkulls Servo, SSC-32 / SSC-32U Servo, Pololu Servo, Maestro, and Parallax Servo, plus a Legacy Devices ▶ submenu (MiniSSC Relay, Maestro Relay, SSC-32 / SSC-32U Relay, and more). Every entry in this menu now drives real hardware — as of this build, nothing here is placeholder-only anymore. If a future device type is ever added before its real protocol is implemented, it's labeled right on the menu, e.g. "(no real output yet)" — it would still load/save/export fine, it just wouldn't drive real hardware yet. Picking a new type refills that row's +Value/-Value/Default with sensible defaults for that device.
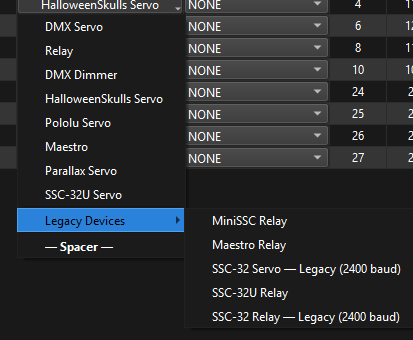
Spacer tracks — organizing a long list
— Spacer —, at the very bottom of the Type menu past a separator, is the one entry in that list that isn't a real device — it's a yellow divider row for visually grouping a long track list (e.g. marking where one skull's tracks end and another's arm tracks begin). A spacer is always disabled, has no address or port, and shows — in every numeric column; only its name is kept, and it exports a minimal disabled record so row positions stay aligned for VirtualHaunt. Converting a row that already has real data (an address, or a name that isn't the default "Device #N") to Spacer asks for confirmation first, since doing so clears that data.

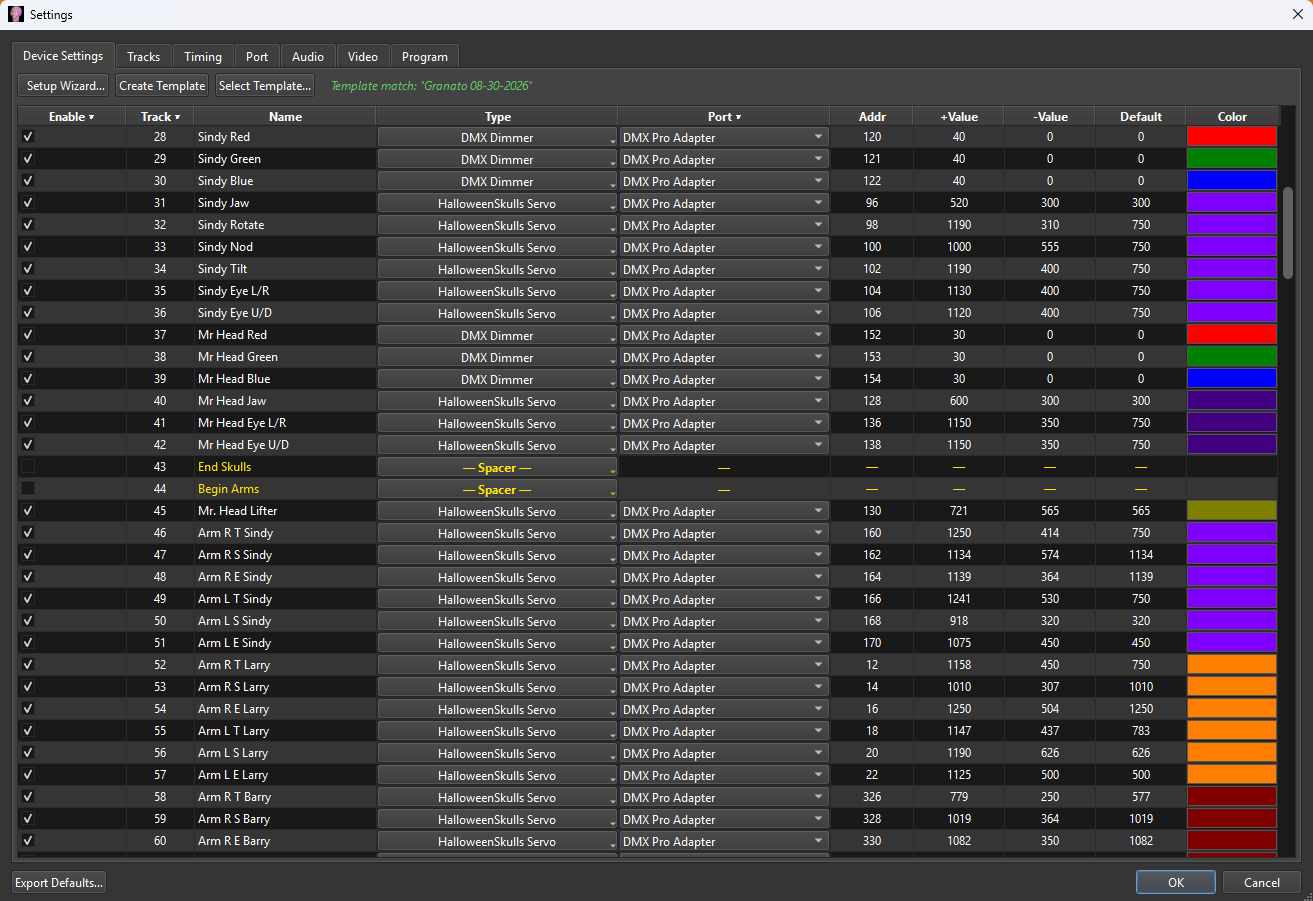

Column header menus — bulk edits
Click Enable ▾, Track ▾, or Port ▾ directly on the header bar (not a row) for bulk options:
- Enable ▾ — Enable All, Disable All, Enable range… (a From/To dialog; tracks inside the range are enabled, everything outside is disabled), and Disable all unused tracks (disables any track with zero events referencing it — a no-op message appears if there's nothing to disable).
- Track ▾ — quick track-count picks (50 / 128 / 256 / 512) or Custom… for any number 1–512. Raising the count adds new default tracks named "Device #N"; lowering it below where real events already exist is blocked with a warning and clamped to the minimum that keeps that data.
- Port ▾ — pick a port name first, then choose All tracks or a range of tracks in the follow-up "Set Port" dialog; tracks outside a chosen range keep whatever port they already had.
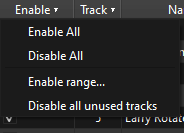
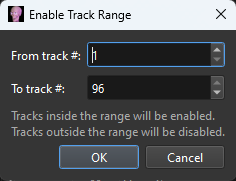


Create Template / Select Template
These are the same buttons covered in "Building a Character Template" — shown here for completeness. Create Template asks for a name and saves the current track layout plus Scene Map (no events, no audio) into Documents\VirtualHaunt\Templates. Select Template… lists every saved template there; opening one closes Settings without saving any of the current dialog's changes and opens that template as a new routine instead.
Tracks tab
Choose how many tracks are displayed. The minimum allowed is one more than the highest track number that already has an event on it — you can't shrink the list out from under existing data. Above 512, RCP warns and refuses: a DMX universe is hard-capped at 512 channels.
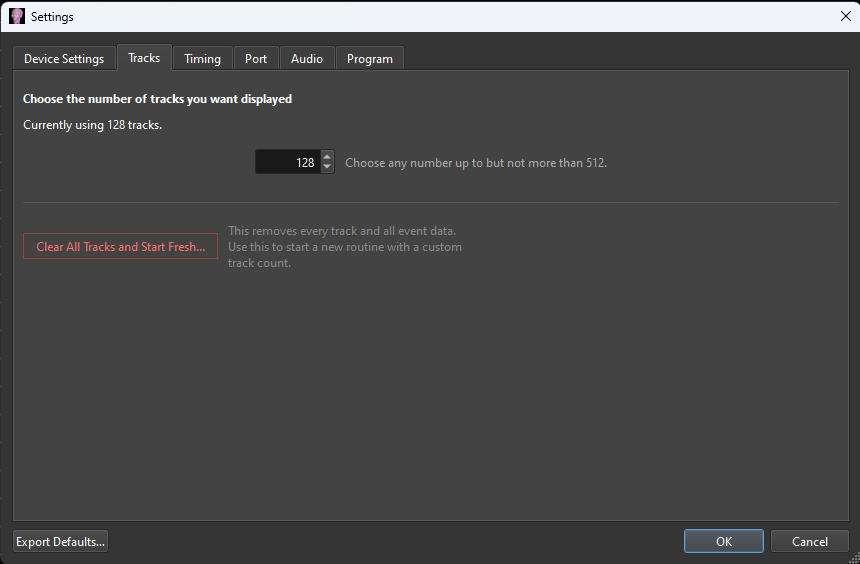
Clear All Tracks and Start Fresh… deletes every track and all event data, and asks for a new starting track count. This only actually happens when you click OK on the outer Settings dialog — Cancel at any point (this dialog or the main one) discards the pending clear entirely, nothing is lost until you commit.

Timing tab
Nothing to configure — a single fixed readout of the frame rate RCP runs at, kept in lockstep with your DMX adapters and Helmsman/VSA.
Port tab
Picks which COM port RCP's DMX output (ENTTEC USB Pro protocol) goes out on. RCP scores every port it sees on your system — a device that identifies itself as DMX/ENTTEC/HalloweenSkulls hardware, or has a HalloweenSkulls serial-number prefix, gets a ★ and is auto-selected; a plain FTDI chip (most generic USB-DMX adapters) is offered but not auto-picked; anything recognized as DMX-related but known to be incompatible with the ENTTEC Pro protocol is flagged with a ⚠ and triggers a one-time warning dialog per Settings session. Refresh rescans.

A track only actually sends DMX when it's enabled, its Type is DMX Servo/DMX Relay/DMX Dimmer/HalloweenSkulls Servo, and its address is 0–511. HalloweenSkulls Servo tracks use two consecutive DMX channels per axis (16-bit, high byte first) — this is why its Addr column advances by 2 per track in a fully-addressed skull.
Audio tab
Add one or more audio files to the routine: Browse… for a file and it is added to the list straight away, then pick an Output device for it if you are not using the system default. (The Add Audio button is still there for the rare case where you type or paste a file path into the field by hand rather than browsing.) Each row gets its own AGC (compress and peak-normalize to a consistent loudness) and Gate (silence anything below -40 dBFS before compression, so the noise floor doesn't get amplified) checkboxes, both on by default; checking Gate reveals a Release slider (80–1500 ms) for that track. Select a row and click Delete Audio (or press Delete/Backspace) to remove it.
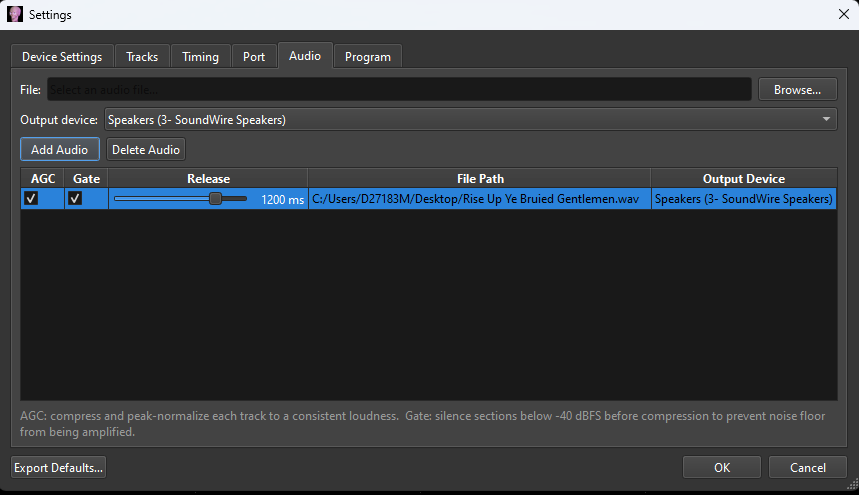
Program tab
App-wide preferences (saved once for the whole program, not per-routine): Autosave — a background recovery copy on a timer, separate from your own Save, restored via Tools → Recover Autosaved Work — and High Swing Mode, the automatic BPM-gated head-bob effect for Singing Mode (see "Singing Mode" earlier).
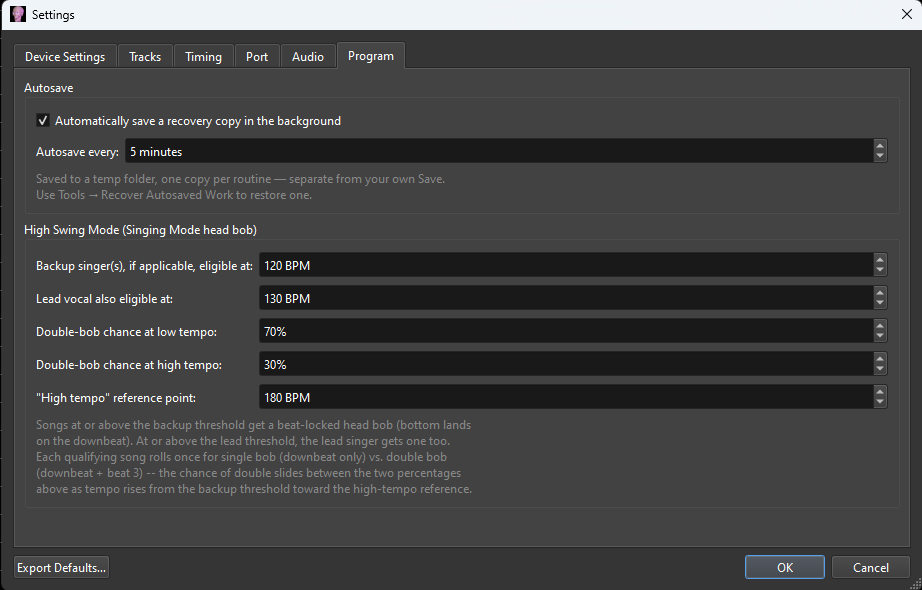
| High Swing Mode field | Meaning |
|---|---|
| Backup singer(s), if applicable, eligible at | Tempo (BPM) at or above which the backup singer(s) get a beat-locked head bob. Applies whether there's one backup singer or several — nothing here assumes a fixed cast size. |
| Lead vocal also eligible at | A separate, typically higher, BPM threshold at which the lead singer also gets the head bob. |
| Double-bob chance at low/high tempo | Each qualifying song rolls once for single bob (downbeat only) vs. double bob (downbeat + beat 3) — the chance of double slides between these two percentages as tempo rises from the backup threshold toward the high-tempo reference below. |
| "High tempo" reference point | The BPM at which the double-bob chance finishes sliding to its high-tempo value. |
Crash Reports
If RCP ever crashes, it saves a local report the moment it happens, then on your next launch offers to help you send it in — never automatically in the background, and never from inside the crash itself. It opens your own default email program (Outlook, if that's what you use) with the report pre-filled and addressed to Halloween Skulls, so sending it goes through your own already-configured email account rather than any server RCP itself depends on. The full report is saved at Documents\Routine Creator Pro\last_crash_report.txt — since a plain email can't attach a file automatically, attach that one yourself before hitting Send.
The Crash Reports checkbox on this tab controls whether that prompt happens at all — it's on by default. Turning it off just discards the saved report on your next launch instead of offering to send it.
Shortcut Reference
Timeline navigation
- Mouse wheel — horizontal zoom, anywhere in the timeline
- Shift + wheel — vertical row-height zoom
- Ctrl + wheel — horizontal zoom (alternate binding)
- Click the ruler — move the playhead there
- Drag a marker — reposition the First or Second marker
Event editing
- Click an event — select it, isolate its track in the plot view
- Ctrl + click — add/remove from multi-selection
- Drag an event (or a selection) — slide it earlier or later; it always stays on its own track, so a selection can't end up on the wrong tracks. To move events to other tracks, use the Paste Here modes or Copy these motions to another character.
- Right-drag on empty timeline — draw a selection box; keep dragging past the edge of the window and the timeline scrolls that way (sideways, up/down or both) until you let go
- Drag an event's left/right edge — resize its start/stop
- Double-click an event — open Event Properties
- Right-click an event — context menu (properties, delete, copy, Bezier easing, etc.)
- Delete — delete the selected event(s)
- Ctrl+C / Ctrl+V — copy/paste (paste keeps the original tracks, at the First marker or the playhead)
- Right-click the timeline — the four Paste Here modes, which choose whether track and time come from where you clicked
- Ctrl+Z / Ctrl+Y — undo/redo, last 25 edits, kept separately for each open routine
Channel column & plot view
- Right-click a track name — Adjust Track Amplitude… (scale every event on that track, −80% to +80%) or Adjust Servo Offset… (shift that track's range in this routine only) or Match My Servo… (convert the track for a servo that runs the other way)
- Ctrl + click a track name — toggle it in/out of the plot's isolated set
- Ctrl + click the "Channel" corner label — clear isolation, show every track
- Drag the channel column's right edge — resize it
- Drag the plot section's top edge — resize plot height
Layout
- View → Track Background Color… — pick a base color; the alternating row shades derive from it automatically
- File → Save Layout as Default — saves your whole startup setup: window/section visibility, zoom, row height, plot height, splitter position, background color, AND your full device configuration (track/device names, ports, servo ranges, Scene Map). The next time you launch RCP with no routine open, it comes up already set up exactly the way you left it — no need to reconfigure Settings from scratch.
- Routines always play with their own settings. RCP never replaces a routine's track settings with your saved layout when you open it, and never asks — whichever way the routine is opened. To change a routine's settings, edit them in Settings and save the routine.
- File → Revert to Factory Default Layout — clears the saved default above (affects future startups only; does not touch a routine you currently have open)
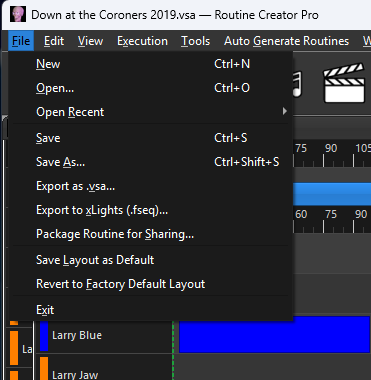
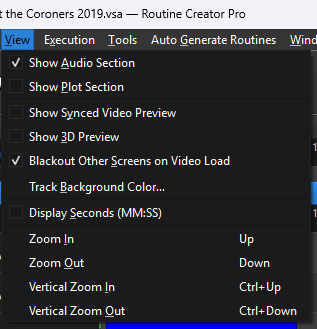
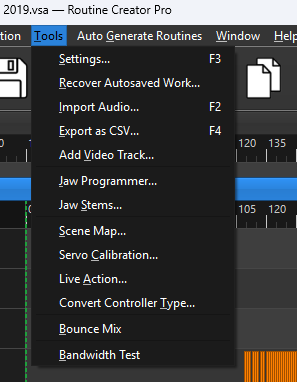
Show Lock & Keep Awake
- Keep Awake is automatic: while RCP is open, Windows will not turn off the screens, start the screen saver, sleep or lock because nobody has touched the mouse or keyboard — so a projector stays on for the whole show. There is nothing to switch on.
- Ctrl+Alt+H (H for Halloween Skulls) — Show Lock on / off. Locks the mouse and keyboard for the whole computer so you can walk away from a running show; press it again to unlock. Nothing is hidden: the timeline and everything on screen stay visible, and playback, video and DMX keep running. A red SHOW LOCK ON appears in the status bar — it deliberately does not show the keys. Helmsman uses the same Ctrl+Alt+H; if both programs are open, either one locks the whole computer.
- Ctrl+Alt+Del always works too — Windows never lets any program block it — so you can never be locked out. Show Lock keeps casual hands off the show; it is not a password.
- Windows' own lock screen (Win+L, or locking because you were away) always covers every screen, a projector included — no program can draw over it. Use Show Lock instead of locking Windows during a show, and turn off Dynamic Lock and "require sign-in after being away" in Windows' Sign-in options if the screens still go to the lock screen.
Getting help
The Help menu, top right: User Guide (this document), Track Naming Guide (the in-app reference for the [Character] [Function] keyword list VH export reads — see Building a Character Template above), Enter Activation Code…, Check for Free Updates… (tells you if a newer version of RCP is available and takes you to the download page), Tell Me About Updates at Startup, and About Routine Creator Pro.
Update notices. A few seconds after RCP opens, it quietly checks whether a newer free version is available. If you're up to date (or offline), nothing appears. If there is one, a single small notice says so — it never blocks the window or a running show, and you can choose Get the Update (opens the Halloween Skulls Downloads page), Remind Me in 10 Days, Don't Show This Again, or Close (you'll be told again next time you open RCP). Tick or untick Help → Tell Me About Updates at Startup to turn the notice back on or off at any time.
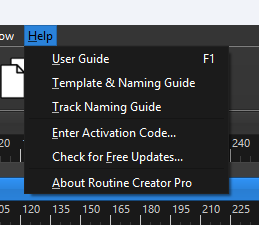
Trial & activation
Routine Creator Pro runs fully-featured for a 14-day free trial — nothing is locked or limited during that time, and nothing pops up asking you to activate until the trial has actually run out. Once it has, you'll be asked for the email address and activation code you received on purchase before continuing. You can also enter one early at any time via Help → Enter Activation Code…, or from the same dialog click Buy Now… to open the purchase page.
What's Still In Progress
Honest status on anything mentioned above that isn't fully finished yet — see RCP Overview.html for the complete, continuously-updated feature inventory.
- Bezier easing is functional but not fully polished end to end.
- A macOS build is in the works — started, not yet complete. RCP's built-in 3D Preview (section 15) is the foundation this builds on, since the classic VirtualHaunt application itself can't run on Mac.
- A Windows installer is built and working. A macOS installer/package will follow once the Mac build itself is complete.